I am working on a project that uses Power BI embedded to display reports to external users via an application. I’ve used the progression of A sku’s (embedded license via Azure) to support the various reports. I love using the A sku for various reasons, it has a low point of entry offered in the A1. It is easy to scale up to the higher tiers as I need to. It has the ability to pause a capacity at any time. I also enjoy the flexibility of pay-by-the-hour the license provides. However, I just got to the point where one of our capacities is about to exceed the 10GB of RAM I get on the A3. As a result, I started to compare the A4 sku to the P1 sku. They are the same in terms of cores and RAM (8/25), but the P1 has an option to be cheaper.
After researching how to buy and apply the Premium P license I realized there wasn’t an end to end explanation of what to expect and how to apply the P sku to my specific region. This is hugely important in order for some of the Service features to work correctly. When committing to large sums of money, I find its always nice to have these answers up front, so I hope the following walk through helps those decision makers out there.
Analyze the A sku
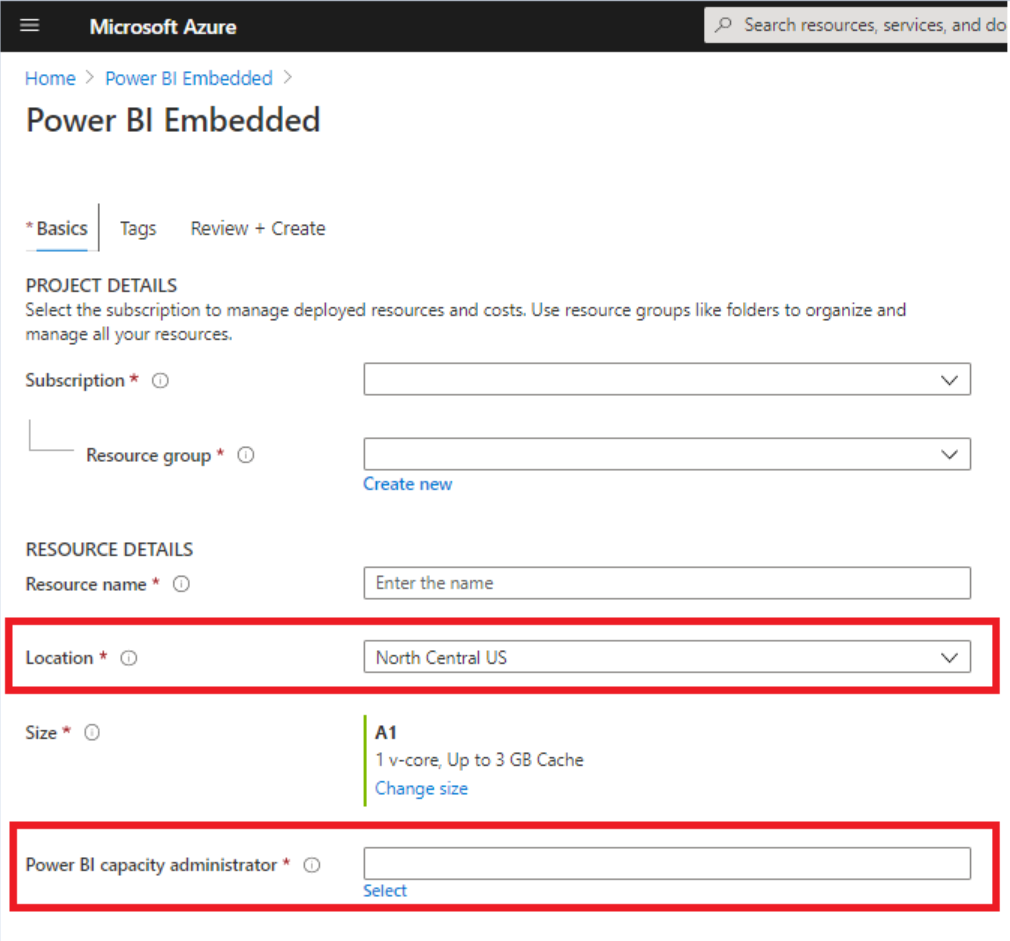
Before we jump into the P sku, lets take a quick moment to see how an A sku is purchased in Azure. There is documentation out there that explains how to sign up for Premium and includes the A sku in Azure. That can be found here ( https://docs.microsoft.com/en-us/power-bi/admin/service-admin-premium-purchase). However, I want to highlight the two areas that most interest me, that I couldn’t find answers too when trying to commit to buying the P sku. There are two key areas that I care about the most with this purchase. The first, is the location of the capacity (region). Second is who gets assigned as a capacity administrator. When you purchase the A sku, those are front and center. As a result, the license purchase is an easy process because I select them prior to committing any money.
Purchase the P sku
Unlike the A sku, you purchase the P sku in the Office 365 admin center. The glaring difference from the experience with the A sku is that you purchase the P1 license without any configuration… This can cause a bit of heartburn if you need to ensure that the capacity is applied to the right region upon purchase. For the moment, you can just assume things will come out smelling like roses and move on to the steps to purchase the P1 license. In the O365 Admin Center under Billing you will Select Purchase Services and then Search for Power BI. This pulls up the list of licenses you can choose from and you are going to Select the Power BI Premium P license.
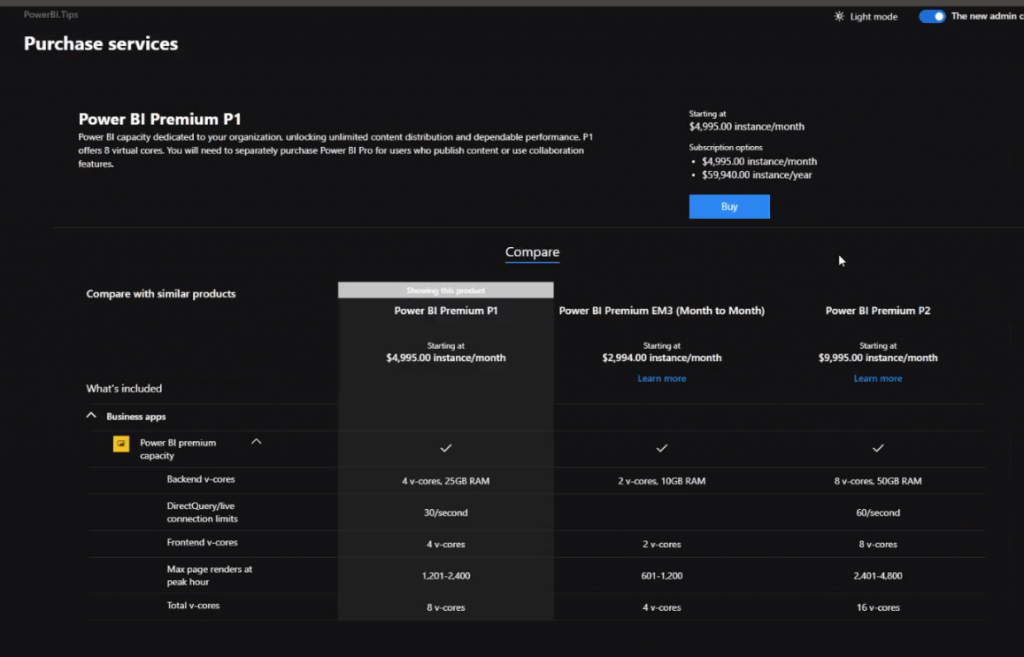
Selecting the license presents you with the options for payment type.
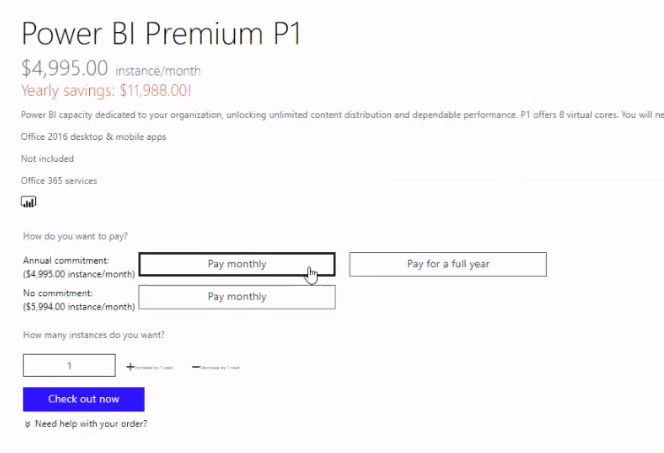
Here is where we see the much cheaper price of $4,995.00, but it comes with the yearly commitment. (As a side note, I really wish we had the yearly commitment option with the A sku, with that option available, I wouldn’t even have to muck around with the P sku for my implementation.)
After you complete the purchase process you can navigate to Purchase Services again and see that the Power BI Premium P license is now active.

Assign and Configure on Setup
Now what?
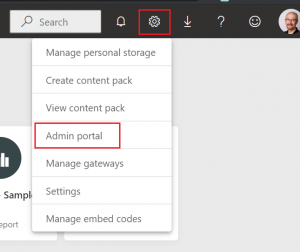
Well, all you saavy Power BI Admins, we head over to the Power BI Service of course!
Log in to your Service (app.powerbi.com) and because you’re all Global Administrators or Power BI Administrators you have access to the Admin Portal. For you first timers, that would be under
Settings > Admin Portal
(If you do not see the admin portal you will need to contact your IT or Security guys to grant you the Power BI Administrator Role.)
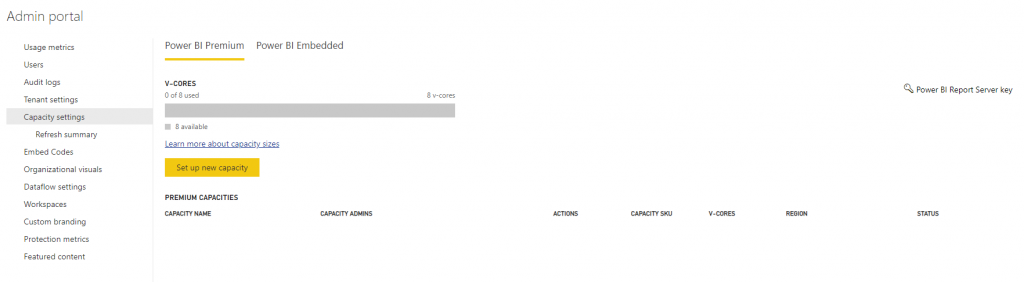
Now normally when you go into the portal you would see a page that looks like this under Capacity settings.

But after you purchase the license, in O365, and come back to the Power BI Service you will see this the first time you log in.
Click on the Set up new capacity button and you get to the screen that myself and all of you wanted to see from the start. Where you add any additional capacity administrators as well as which region you want to use for your capacity.
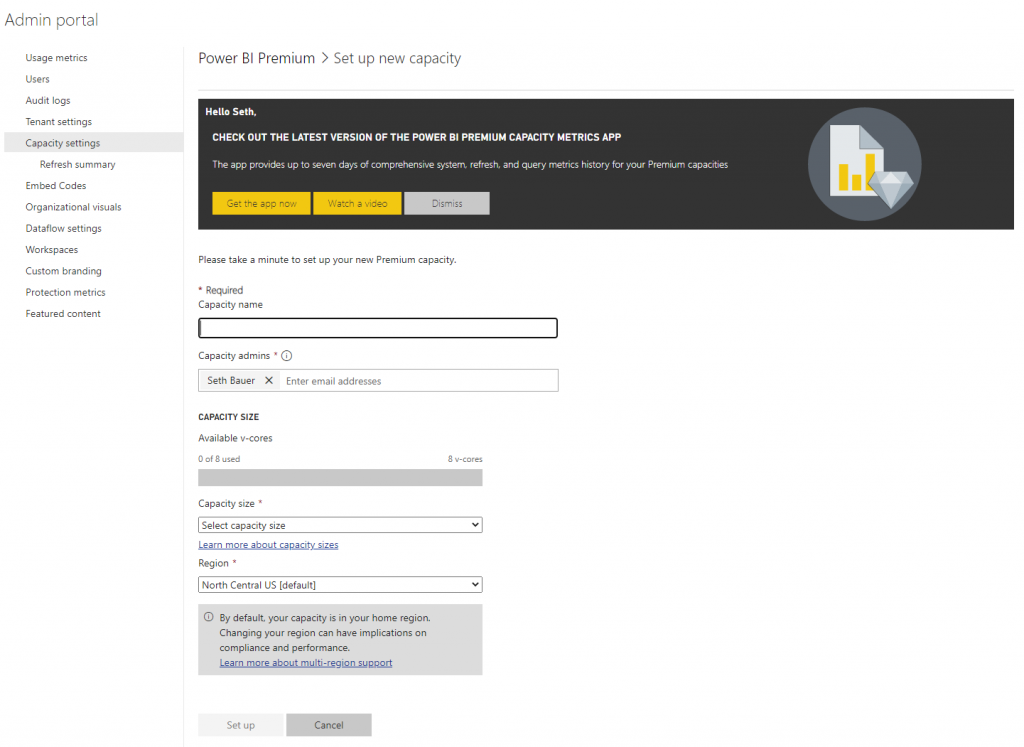
As the gray box outlines for you, the initial region is the home region of the Power BI tenant, but Clicking on the Region pops up all the other regions you can choose from.
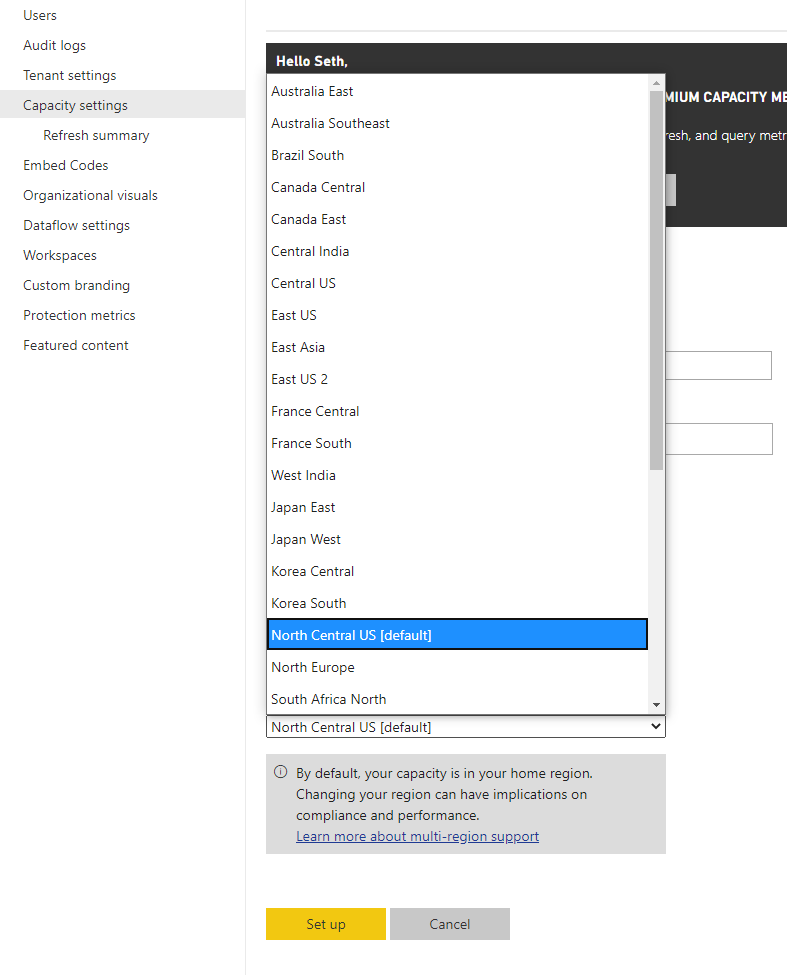
Make your selections. All that remains to be done is Clicking on the Set up button. Now your capacity is provisioned based on your configuration settings.
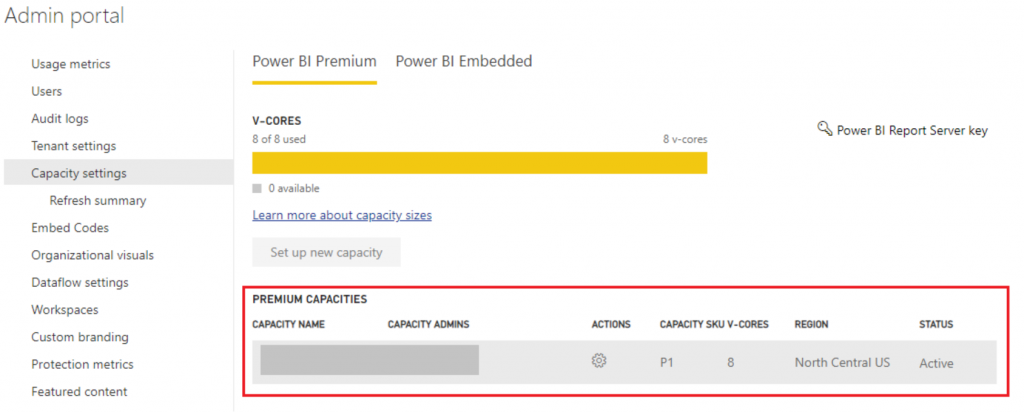
Your new view when you log in to work with your capacity looks like this. You’ll be back often to monitor and alter any capacity configurations.
Apply Capacity to Workspace
I’ll close this out by showing you the final step of how you apply that new capacity to your workspaces.
Jump back out into the home screen by Clicking Power BI in the upper left hand corner of the browser.
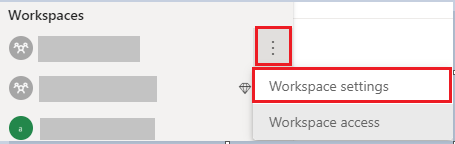
Click on Workspaces and hover over the workspace that you want to add to the capacity.
Click on the ellipses (3 dots) that appear to the far right and Select Workspace settings.
The Settings dialogue will appear on the right hand side and you will Click on Premium in the header. Give the application a moment and you will be able to toggle the Dedicated capacity to On
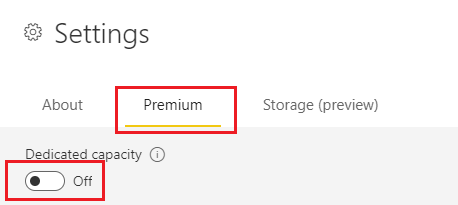
In the dialogue, Select the newly provisioned capacity and Click on Save.
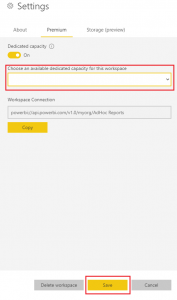
You will now see a little diamond next to your workspace name.

After all that, you now have a Premium P license capacity supporting the datasets and reports in that workspace.
Wrap Up
I had too many unresolved questions during this process. I was looking for something like this blog to assure me I was headed in the right direction. Since I didn’t find it, I decided to write up my experience. I want to make sure others with those same questions can to see what it looks like to go through the process from an end to end. Hopefully this perspective helps when making the leap into Power BI Premium P1 licensing.
If you like the content from PowerBI.Tips, please follow us on all the social outlets to stay up to date on all the latest features and free tutorials. Subscribe to our YouTube Channel, and follow us on Twitter where we will post all the announcements for new tutorials and content. Alternatively, you can catch us on LinkedIn (Seth) LinkedIn (Mike) where we will post all the announcements for new tutorials and content.
As always, you’ll find the coolest PowerBI.tips SWAG in our store. Check out all the fun PowerBI.tips clothing and products: