Tag: Import

  • Power BI Connections: Import

    Power BI Connections: Import

    Power BI’s default connection type is Import. In fact, if you have never dealt with a data source that handles multiple loading methods, you may never know that there are different loading methods because Power BI automatically connects via import. However, if you’ve ever worked with sourcing information from databases or models, then you have seen the option to select Import vs. Direct Query or Live Connection.

    Note: This is a continuation of the Power BI Connections series.  If you would like to read the overview of all the Power BI Connection types you can do so here.

    Below is a quick chart to outline some of the considerations to help you decide whether import is right for you.

    Connection Type Outline
    Connection Type Outline

    Import is the only connection type that brings to bear the full capabilities of the Power BI Desktop. As you move from Import to Direct Query to Live Connection, you trade off ease of use for solutions that will scale.

    Import will pull in the data from the data sources that you have connected to and store & compress the data within the PBIX file. The eventual publishing of the PBIX file will push the data to Azure services supported in the Power BI Backend. For more information on data movement and storage see the Power BI Security Whitepaper.

    When using import, the full Edit Queries suite is available to mash up any data source, transform data-sets and manipulate the data in any way you see fit.
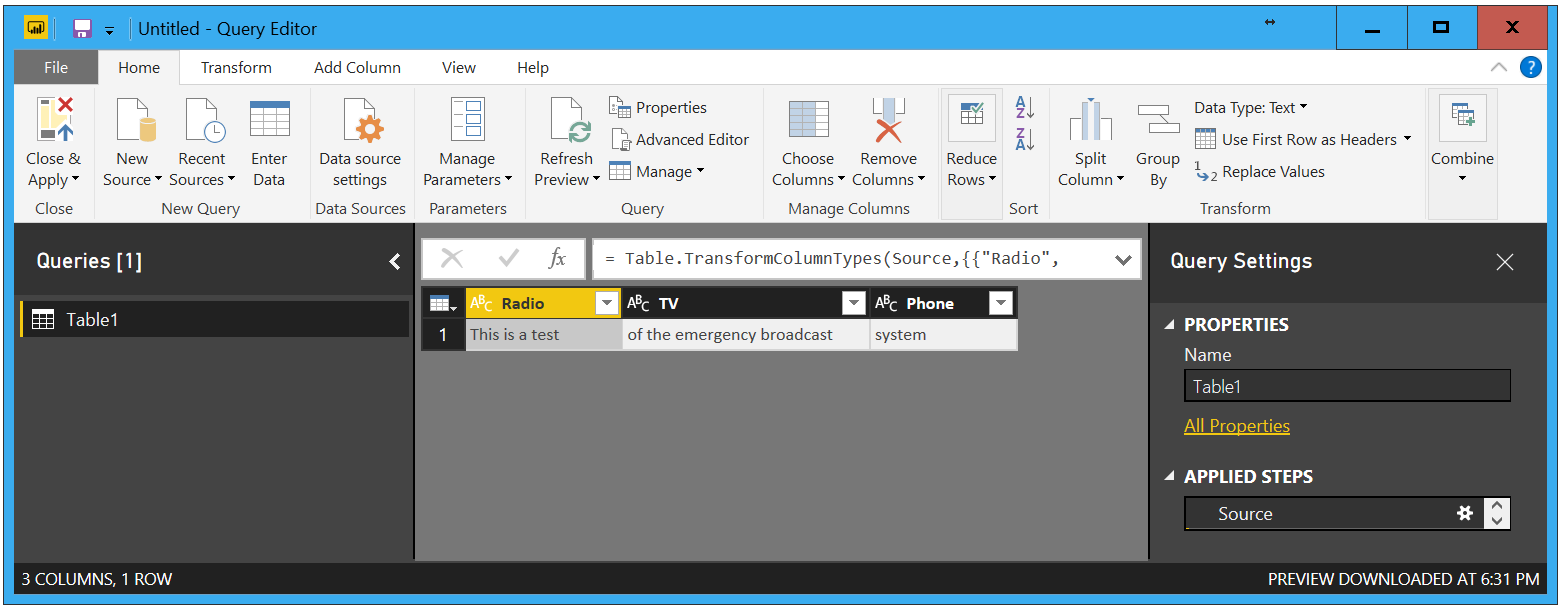
    Query Editor
    Query Editor

    Once you click Close & Apply, the data is loaded into the “front end” of Power BI into the Vertipaq engine.

    Note: The Vertipaq engine is used in both Excel and SQL Server Analysis Services Tabular models. In simple terms, it is the backbone that compresses all your data to make it perform extremely fast when visualizing, and slicing & dicing. For more detailed information on the engine see an excerpt from Marco Russo & Alberto Ferrari’s book “The Definitive Guide to DAX: Business intelligence with Microsoft Excel, SQL Server Analysis Services, and Power BI” found here.

    At this point it is ready for you to extend by building out the relationships between your objects in the model section. After the model is set up you will now be able to add any additional calculations in the DAX (Data Analysis Expressions) formula language. There are two types expressions that you can create, measures and calculated columns. To create these, you can go to modeling, and select the option. When you do this, the formula bar will display. You can also right click on any column or field and select “New measure” or “New column” from those drop down lists.

    New DAX Measure or Column
    New DAX Measure or Column

    Other than the formula bar with intelli-sense, there are several built in tools that can help you build those calculations.

    The first method is to Right Click on the desired field and select an implicit calculation from the drop down:
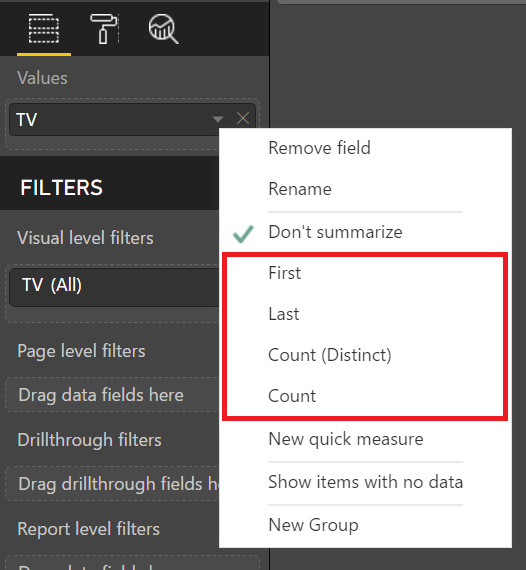
    Using Implicit Calculations
    Using Implicit Calculations

    The second is Quick Measures.  This can be accessed by using right click as described above.
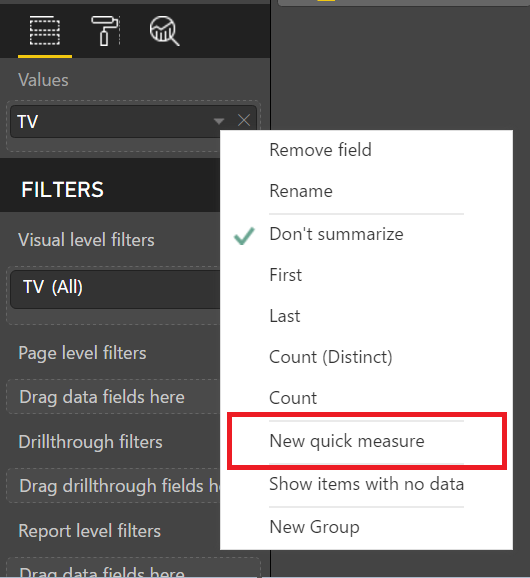
    Using Quick Measures
    Using Quick Measures

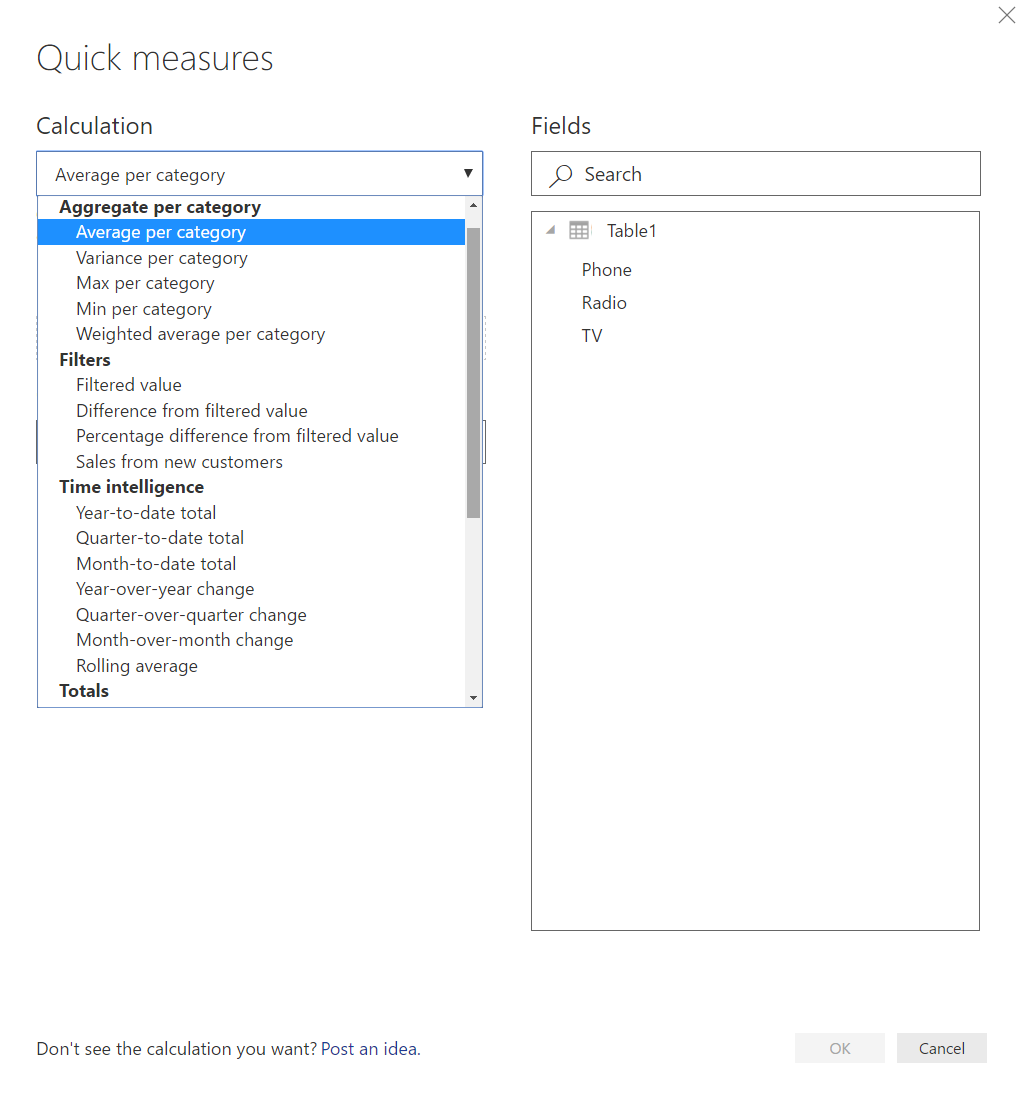
    Here is an example of the Quick Measure dialog box:
    Quick Measure Dialog Box
    Quick Measure Dialog Box

    Quick Measures allows you to choose from a wide variety of calculations to generate a measure. Once the measure is created, you can interrogate the measure and see the code that was generated.  Click on the measure (denoted by a little calculator next to the text) created by the Quick Measure dialog box to see the DAX code.

    Here is an example of what that looks like:

    Sample of Quick Measure
    Sample of Quick Measure

    This is a great method to get your feet wet while you’re learning DAX.

    Note: there are a lot of safety features added to these Quick Measures, such as, an “if” statement wrapped in a “isfiltered”.  You might have to remove these bits of code in order to play with the measure.

    When you have completed your report and publish the report & corresponding dataset to the Power BI Service, you will need to schedule a refresh.  This will be required for any report which relies on the Import Connection. There are numerous use cases that surround whether or not you need a gateway, but a simple rule applies. If the data comes from an on-premises source, you will need one, for cloud sources you usually do not, but you can find in depth refresh documentation here.

    The Import connection has the least amount of restrictions between the three methods, Import, Direct Query, and Live Connection. However, there are a few Import restrictions you should be aware of.

    First, depending on your data source and the size of the data set, the processing of the model could take a bit of time.

    Second, since all the data is being loaded into a table, there is a limitation on how big the file can get for successful publishing to the Power BI Service. That limit is 1 GB for free users & Power BI pro users, 2 GB for Report Server Reports and for Premium Users the size is only bound by the amount of memory you have purchased.

    Note:  The PBIX file can get as large as you want, however, it won’t let you publish.

    Using Import is good when:

    1. You can schedule your data to refresh
    2. Data only needs to be refreshed periodically
      1. Can be refreshed up to 8 scheduled refreshes in a day (restriction from Power BI Service)
    3. The amount of data your importing is relatively small (doesn’t need to scale)
    4. You need to mash up multiple sources such as Azure SQL database and google analytics data sources

    In summary, the Import method is the most flexible, provides all the tools to connect, mashup, extend and visualize your datasets within the Power BI Desktop. It is likely the most used connection type and is the default for all connections. The data you connect to is drawn in, and a copy created and used in both the Desktop and the Service. Scheduled refresh is a requirement for almost all scenarios, and it is likely a gateway is required as well if your data is not located in the cloud.

  • Power BI Connection Types

    Power BI Connection Types

    Get Data – Power BI Connection Types: An Introduction

    Hi, I’m Seth, I am very excited to be a contributing on PowerBI.tips.  Mike has done an incredible job curating fantastic content for the PowerBI Community.  In this first blog I will introduce you to the different types of connections that you can make using the Power BI Desktop. We will identify the various types of connections.  In future posts we will dive into specific examples of usage and tips in tricks.

    When I say “Types”, I don’t mean connecting to databases, Excel, SharePoint, etc. Those are just different data sources. I’m referring how Power BI ingests or interacts with data sources that you want to connect to. Believe it or not, Power BI doesn’t always have to pull all your data into the Power BI Desktop file. Depending on what sources of data you are connecting to, you could not even realize that there are more options, or be uncertain of what they do. In fact, depending on what type of connection you choose you are also altering how the Power BI Desktop functionality works! Now that I have your attention, let’s jump into the good stuff.

    First things first. The only time you will be faced with an option to choose a type of connection, are when you connect to a data source that support multiple connection types. If all you connect to is Excel, you would never see an option in the dialogues because it only supports one type of connection.

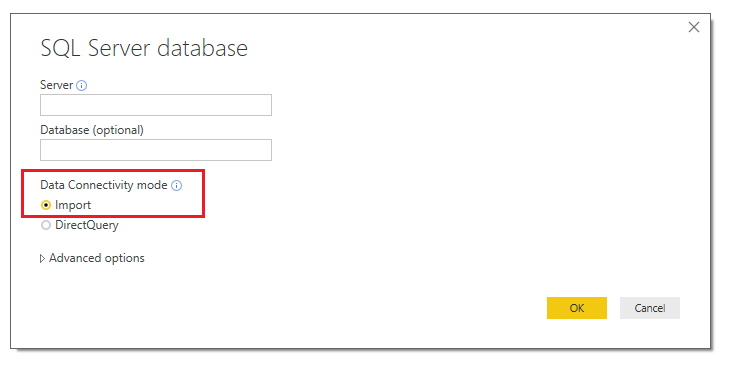
    There are really 3 main types of connections. The first is the most widely used, and is the default when connecting to most data sources. It is Import. This connection will ingest or pull the data from the data source and become part of the PBI Desktop file.  An example of where you would select import Is in the SQL Server dialog box.

    SQL Server Import
    SQL Server Import

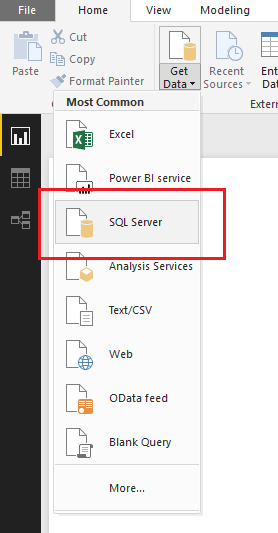
    You can import data from a SQL Server by clicking Get Data on the Home ribbon.

    Get Date SQL Server
    Get Date SQL Server

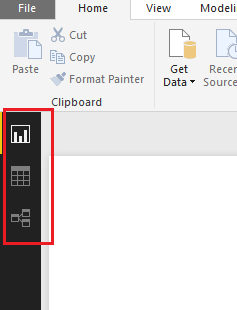
    The import connection type allows you to use the full capabilities of the Power BI Desktop and you can manipulate it however you see fit. A way to validate this is by looking at the left-hand navigation and you will see three selections.  The top selection which resembles a bar chart is the Report Page.  This is where you would place all your visuals and develop your report pages.  The second item from the top, which looks like a table is just that, the Data view in a table form.  This lets you see all the data contained with a loaded data table.  Finally, at the very bottom, the relationships selection.  This is where you will see multiple tables and the connections between the tables.  The relationships section feels like working SQL or in Microsoft Access.

    Import Options
    Import Options

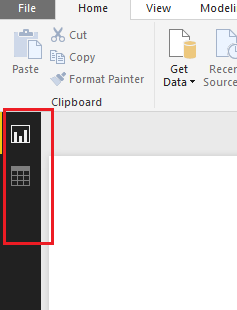
    The 2nd connection type is Direct Query.  Notice in direct query mode the third item, relationships has been removed.  The direct query connection type is only available when you connect to certain data sources. The list of the data sources that are accessed using direct query can be found here.  This connection is unique in that the data does not get loaded into the PBI Desktop.  What happens, is that Power BI can communicate in the language of the data source and request information as you interact with your Power BI Visuals. The useful thing about this connection is that the data never leaves the data sources, it is only queried.  Direct Query does limit what you can do from a data manipulation perspective.  Power BI assumes you are already doing all the necessary data manipulations in your source. As a result, you don’t even have the option to mashup data and that selection is removed in the left-hand nav.

    Direct Query
    Direct Query Options

    The 3rd type is Live Connection. There are only 3 data sources that support the live connection method at this time.  All of them are a type of (SSAS) SQL Server Analysis Services. Those types are Multidimensional, Azure Tabular and Tabular on premises. The live connection type is the most unique in that it recognizes the full model or cube that you’ve created.  Power BI Desktop turns off all data prep features.  Thus, the user is given a bare minimum in formatting and report side calculations.  All the heavy lifting is done on the server that supports the model and Power BI is only used as a reporting tool. This connection is used mainly by IT and enterprise implementations. If one looks at the left-hand navigation, you quickly realize that it is the most restrictive in terms of what can be done in the Desktop itself.

    There is a fourth Live Connection that defaults to the connection type, and this occurs when you use the Power BI Service as a data source. This connection is using a SSAS connection, only the end users don’t need to set anything up other than having dataset to connect to in the Service.

    Live Connection Options
    Live Connection Options

    Finally, there are two types of connections that dive a bit deeper than what comes with the Desktop out of the box. Those are Custom Data Connectors and API/Streaming. For the time being, we’ll leave these as just high-level points for now, and dive deeper into them in the specific articles in the future.

    I hope you’ve found this initial primer useful. As this series continues we’ll dive into some of the reasons for using each of these types of connections, why you would want to, and the positives and negatives in choosing which one, provided you have a choice.