Power BI Version Control is a free, fully-packaged solution that lets users apply version control, local editing, and manage PBIX or PBIT files. The solution runs entirely on Power Apps (Power Platform) and SharePoint. Power BI Version Control can give business users or smaller organizations the ability to easily implement and utilize version control for their Power BI projects.
Note: updating the app version will require you to re-import the SharePoint connection and folders.
The latest version is 2.0.1
In this Article
- What is Power BI Version Control?
- Why use Power BI Version Control?
- How to use Power BI Version Control
- Using the App
- Limitations and Scope
What is Power BI Version Control?
In most version control systems, branching is a method to make edits to code in a safe and reliable way. Typically, users “branch”, or copy, the code to their local machine to make edits. They can then “merge” the code back to the master code, adding comments of what has changed and who changed it. Each change is saved as a different version, with the ability to go back to any version. Small, frequent changes are helpful, making it easy to undo any errors. This type of version control requires that every file be saved in a plain text format, so the differences between two versions of the same file can be easily identified, cherry-picked, merged, etc.
However, unlike pure source code, Power BI reports are packaged into PBIX or PBIT files, which cannot be compared against each other in the way we just described. This makes it much harder for multiple users to work on the same set of files simultaneously. While it is possible to use Azure DevOps, GitHub, etc. as a version control solution for Power BI reports, it’s difficult to setup and use (especially for non-technical business users). The Power BI Version Control solution bridges that gap by harnessing SharePoint’s built-in file versioning and the user-friendly UI/UX of Power Apps.
Why use Power BI Version Control?
Single shared location for reports (no emailing files!)
Keeping all of your Power BI report files in SharePoint means that you’ll always know where to find them, and that they’ll always be the latest versions of those files.
Keep all versions of the report (no adding numbers to file names!)
We often want to keep files from the past in case we need to roll back changes. Instead of adding version numbers or initials to the file names (like Sales_Report_v2.5_Final(1)(1).pbix), SharePoint will keep all versions of your report files automatically. Additionally, by using this Power BI version control method, it is possible to roll back to any of these versions whenever needed.
Ability to check out files exclusively, like a library – only one person can make changes at a time
When working in teams, you may have multiple people working on a project (see this post on Power BI team members). If you have more than one person who may edit a file, we want to make sure they are not trying to do it at the same time. Power BI Version Control ensures that only one person can check out any given file at once. As a result, nobody else can make edits to a file that you are working on. No more conflicts or working on outdated versions of files!
Ability to check-in files – add comments describing changes made since the last check-in
After making edits, we want to be able to keep comments about what was changed. With each version we are able to add a description of what has changed since the last version.
Work locally – make all changes on copies, so we do not edit our files directly
Another important benefit of Power BI Version Control is that we always work on copies of our reports. We can save and experiment as we work on the files, knowing that we will not accidentally damage a live report. We do all work locally on our machine and separate to our production or live reports. If needed, we can discard all changes and start again.
How to use Power BI Version Control

Installing the App
- Download the Power BI Version Control app solution file (from the link near the top of this page)
- Navigate to https://make.powerapps.com/
- Ensure the correct environment is selected
- On the left menu bar, navigate to Solutions
- Select Import on the top menu bar

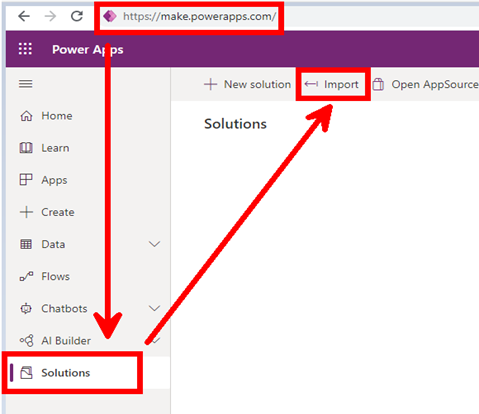
- Select browse and chose the PowerBIVersionControl_2_0_1.zip file you just downloaded
- Click Next and Next again until you reach the Connections screen
- If you have existing SharePoint connections you wish to use (recommended), you can select them from the drop-down list. If not:
- select + New Connection.
- Select how to connect (usually recommended to Connect Directly)
- In the new page that opens, click create and sign in if prompted
- Once created, you can close the current tab and navigate back to the import screen
- Click refresh then select the new connection from the drop-down list
- Click Import. This step may take a few minutes to complete
Configuring the App
- Navigate to https://make.powerapps.com/
- Ensure the correct environment is selected
- On the left menu bar, navigate to Solutions
- In the list of Solutions, find Power BI Version Control
- Click the ellipsis and select edit

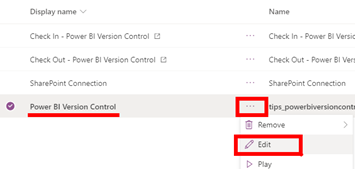
- The app will now open in edit mode
- Add the SharePoint folder by following the following steps:
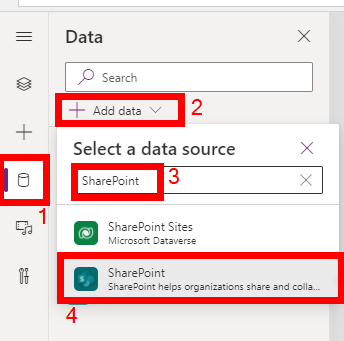
- Open the data sources tab
- Select Add data
- Type “SharePoint” in the search bar
- Select SharePoint (note: be careful not to select “SharePoint Sites”)
- Choose the SharePoint connection you selected earlier
- In the pane that opens, enter the URL of the SharePoint site. This should be in the format:
https://DOMAIN.sharepoint.com/sites/SITENAME - Click Connect
- Choose the correct Document Library and click Connect

- Select the tree view and navigate to the Settings Screen


- Fix any red X marks on the page by updating the settings to match your folder structure (as described in the next section). If you used the default folder and document library names you should not need to update any settings
Setting the connections
- There are four numbered blue boxes that may require updating. If you see any red X marks next to any of the following boxes, click on that box and update the required property.
1.

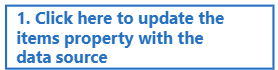
Click this box and make sure Items is selected. Update the text to match the document library name (this is also the name of the data source you imported earlier). Use the IntelliSense (auto-complete) to ensure the correct value is selected. The text should turn green when correct, and the red X should disappear.


2.


Click this box and make sure OnSelect is selected. The formula should read Refresh(‘[Your Document Library]’). Update the text to match the document library name (this is also the name of the data source you imported earlier). Use the IntelliSense so ensure the correct value is selected. The text should turn green when correct, and the red X should disappear.


3.

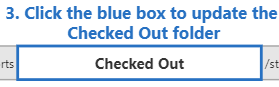
Click this blue box (not the label) and make sure Text is selected. Update this to the checked out folder name, surrounded by double quotation marks.


Note: if you add a forward slash to the end of the folder name, this will add all checked out folders to the same folder. Otherwise, a sub-folder will be created for each user based on their user ID.

4.

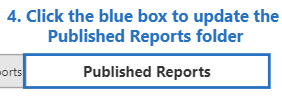
Click this blue box (not the label) and make sure Text is selected. Update this to the published reports folder name, surrounded by double quotation marks (e.g. “Published Reports”).
- Check that there are no red X marks. A red error message will also show at the bottom of the screen if there were any errors in setup. Resolve all errors before publishing.
- Click File then Save
- After the app has saved, click Publish to ensure all changes are deployed
Using the App

We recommend embedding the Power BI Version Control app in a Teams channel. Additionally, the SharePoint site can be added to the Files section in Teams. This will allow all appropriate members to access the Power BI Version Control app and report files in one place.
Check Out
- Open the Power BI Version Control app
- Click the Check Reports Out button on the Home Screen
- The Check Out Screen will list all PBIX and PBIT files in the Published Reports folder. Select the reports you wish to modify in the Check Out Reports column. You will only be able to check out reports that are not already checked out
- Click Check Out Reports button
- Wait a few moments for the reports to process. It may take longer if using large files
Editing the files
- Navigate to the OneDrive folder on your local machine. The selected reports will appear in the synced folder Checked Out Reports (or sub-folder)
- You can now open and edit these files. If using live connections, consider using the Hot Swap Connections Tool
- If you want to save copies, you can do so in a sub-folder or elsewhere on your local machine. Avoid this when possible. We recommended to make small and frequent updates / check-ins
- When ready, make sure only the files that are ready for check-in are saved in Checked Out Reports (or sub-folder). Make sure the names of files have not been altered
- If you manually publish reports, publish immediately before closing and checking in
Check In
Once edits are done, Check In the reports from the Checked Out Reports folder to the Published Reports folder. Alternatively, you may wish to discard your work. As a result, this will release the file and ignore any changes you have made. Next, it will delete the file from the Checked Out Reports folder.
Commit changes:
- Open the Power BI Version Control app
- Click the Check Reports Out button on the Home Screen
- This will list all PBIX and PBIT files in the Checked Out Reports folder. Select the reports you wish to Check In in the Check Out Reports column. You will only be able to check in reports that are checked out to you
- Make sure to add comments. Include details on changes you made. If using Azure DevOps, Planner, or some other project management tool, include the relevant ticket/task number(s) in your comments whenever possible
- Click the Check in reports button
Discard changes:
- Navigate to the Check In page by the button on the main page
- This will list all PBIX and PBIT files in the Checked Out Reports folder. Next, select the reports with changes that you wish to discard in the Discard Report column. You will only be able to discard reports that are checked out to you
- Confirm Discard
Helpful Tips
Also included in the app is a flow called Initial Step: Create Power BI Reports Library with Folders.
- Open the flow and select Run
- Paste in your SharePoint site where you wish to create the folders, site e.g. https://powerbitips.sharepoint.com/sites/powerbi
Running this will automatically create a library and folders in your desired site. It will use default names, which means you will not need to configure the app in the settings page after connecting to the data source.
Sync Folders
You should sync the Checked Out Reports (or sub-folder) that was created to your local machine’s OneDrive, allowing for local edits. If using sub-folders, you must check out a file once to create the folder.
Ensure to sync only the Checked Out Reports folder (or sub-folder).
You can sync either through SharePoint or through Microsoft Teams.
From SharePoint:
- Navigate to the correct SharePoint site
- Select Documents and navigate to the Checked Out Reports (or sub-folder)
- In the toolbar, select Sync
From Teams:
- Open the Teams channel
- In the toolbar, select Files and navigate to the Checked Out Reports (or sub-folder)
- Select Sync
You can also add the files to an existing team by selecting Add Cloud Storage.
Note: See more info on syncing here.
You can now access the files in this directory from the local machine.
Limitations and Scope
Known issues:
The app will fail if the internal SharePoint name and the Display name do not match. This happens when a SharePoint site is created, and the display name is manually changed later. We are working on a patch for this.
If you have a very large number of reports, the app may not display all of them. We are working on a patch for this.
Design:
This solution is designed to handle thin report files, and not large models. The solution will copy and publish to one single folder, and is not intended to manage environments (e.g. dev / test / prod). It should be connected to a Development environment, we recommend using Power BI Deployment Pipelines to deploy reports from Dev to Test, and from Test to Prod.
The Power BI Version Control app solution performs these main tasks:
- Check out and lock editing to a single user
- Copy files to a local synced folder for safe editing
- Keep version history and enforce developer comments on each check-in
If you like the content from PowerBI.Tips please follow us on all the social outlets. Stay up to date on all the latest features and free tutorials. Subscribe to our YouTube Channel. Or follow us on the social channels, Twitter and LinkedIn where we will post all the announcements for new tutorials and content.
Introducing our PowerBI.tips SWAG store. Check out all the fun PowerBI.tips clothing and products:
Check out the new Merch!