
This week I had a number of team members tell me how difficult it was to share a PBIX file and the corresponding data between team members. The department hasn’t committed 100% to the idea of using PowerBI.com, and thus wanted to share the actual report. I pointed my team mates to my earlier tutorial about using variables for file locations. After reading the tutorial the team came back with a bunch of griping about how they didn’t want to go into the query editor, people name variables different things, and thus it’s hard to understand what another team member was doing, blah, blah, blah…
So, in order to make peace I took another look at trying to make the sharing of a PBIX file easier. This time I decided to use the Parameters feature within PowerBI. This feature within the Query Editor was released all the way back in April of 2016. I read about it, thought it was interesting but couldn’t find a really good use case. In my current predicament, the parameters feature is the perfect solution.
By using a parameter to store a folder and or file location you enhance the user experience by making it easier for a user to change the Query.
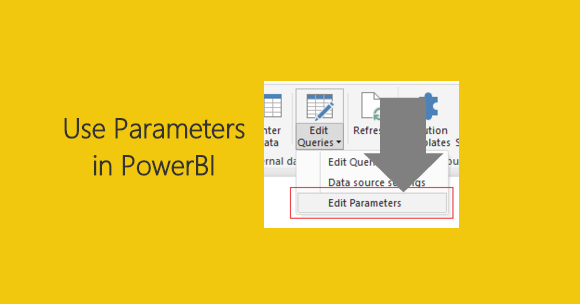
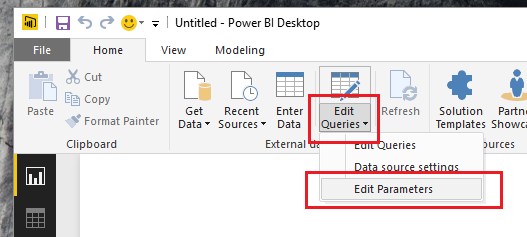
To modify a parameter after it has already been built click on the bottom half of the Edit Queries button, found on the Home ribbon. A menu will pop up and you can select Edit Parameters.
The Enter Parameters screen will pop up. This is where you would change the parameters for a query. In our example this is where we will enter a new folder location for our data.

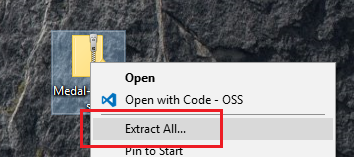
Let’s begin the tutorial. To start we will need to work with some data. In my earlier tutorial, I used the Olympic Medals Count. We will reuse this dataset. Start by downloading the zipped folder Olympic Metal Count files from the following location. Once you have downloaded the sample data, extract the folder and subsequent files from the zipped file. In windows 10, which I am using, you can right click on the downloaded file and select Extract All..
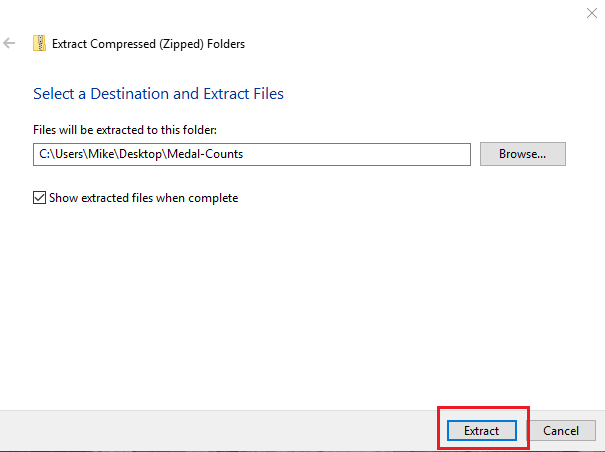
A pop-up window will appear to complete the extraction process. By leaving the default settings the folder will be extracted into the same location as the downloaded file. Click Extract to complete the extraction.
We now have a folder with all our data.
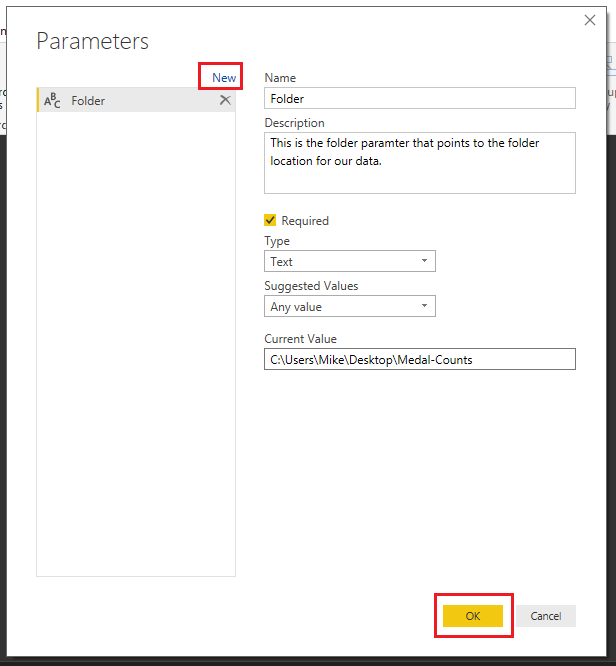
With the data prepared we can now make the parameters within PowerBI. Open PowerBI and click the top half of the Edit Queries button. The Query Editor will open. Click the Mange Parameters found on the Home ribbon. The Parameters screen will open. Click the blue New button at the top left. Enter the name Folder, and include a brief description of this parameter. Since the folder parameter is essential to the query we must leave the Required box checked. Change the Type to Text, and leave the Suggested Values to Any value. Finally enter the Folder Location where our Medal-Count file is located into the Current Value. Click OK to complete the parameter.
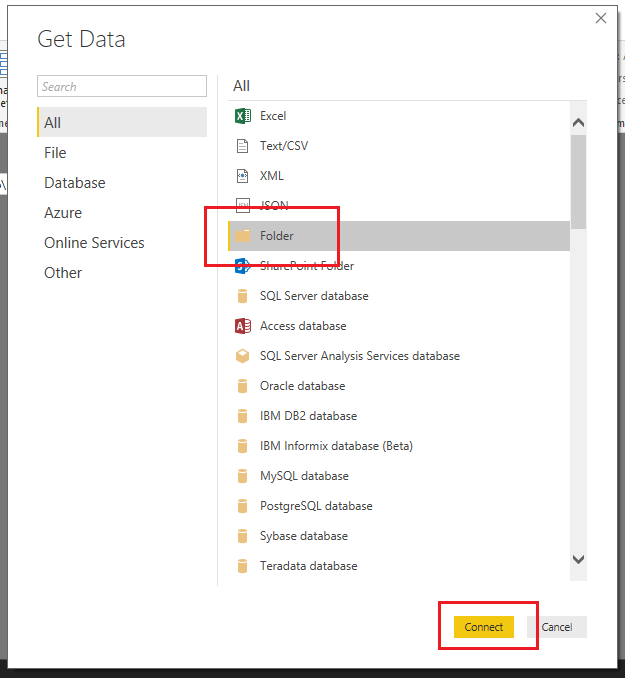
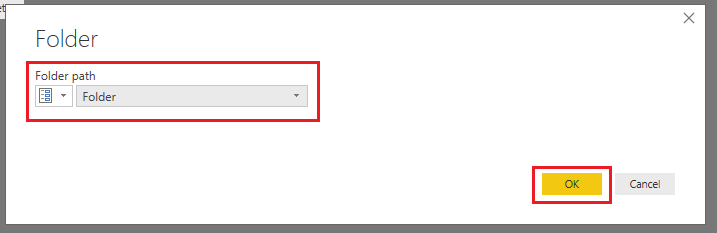
Next, we will create the actual query to load the folder containing our Metal Counts. Click on the New Source button. This will open the Get Data window. Select the Folder option located in the list on the right. Click Connect to complete the Get Data.
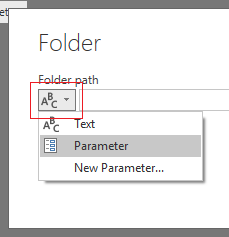
The Get Data window will close, then a new window asking for the folder location will open. This is where the parameter implementation is slick. Click the ABC button to the far right of the Folder Path bar. Change the selection to Parameter and select our newly created parameter labeled Folder. Click OK to load the Folder.
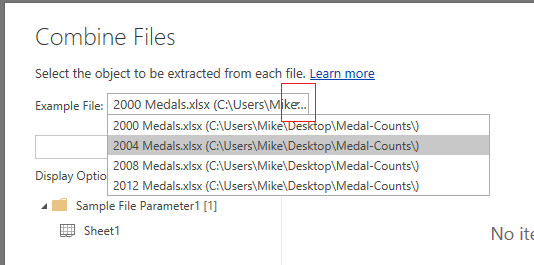
Next the folder prompt opens allowing us to accept or edit the query. Click Combine & Edit to proceed. The Combine Files window will open. Here we can interrogate each file to inspect what is in each file. Clicking the drop-down menu next to Example File: allows us to see the list of all files. Select the 2004 Medals.xlsx file.
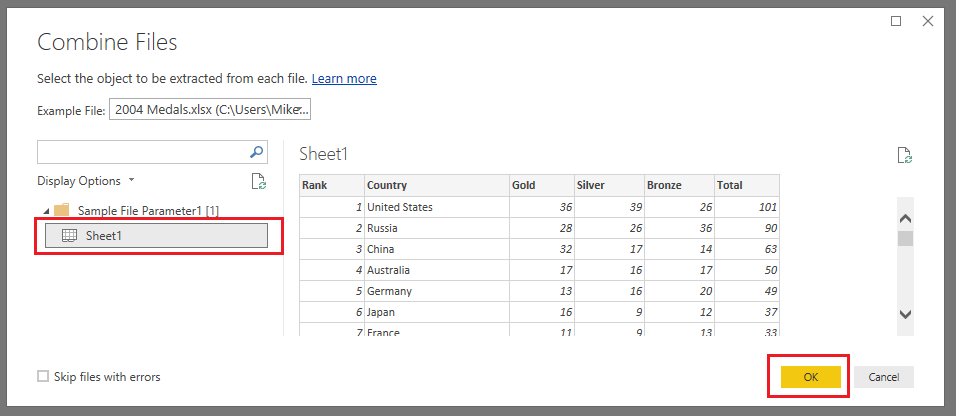
Click the Sheet1 item on the left side of the window. This exposes the data that is contained within this 2004 particular file. Click OK to proceed.
Note: For users that have been working with PowerBI for a while, this Combine Files screen flow is a newer feature. I feel that this greatly simplifies the process and makes it easier to detect issues when loading data.
PowerBI now loads the files into the Query Editor. The Query that we want to use is labeled Query2, change the Query2 name to Metal Count.
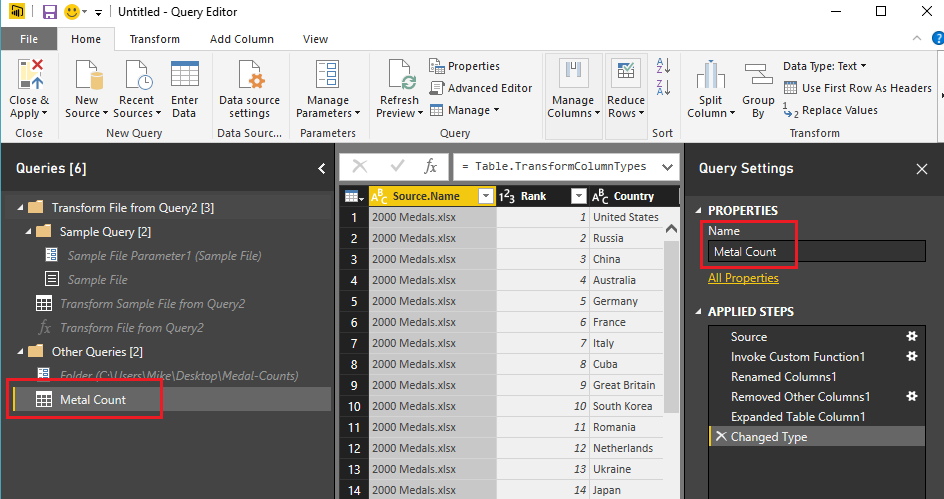
What you’ll also notice is there is a lot more queries on the left side of the screen under Queries. These queries were auto generated when we navigated through the menu screens. Click Close & Apply to complete the data load.
Build the following Stacked Column Chart:
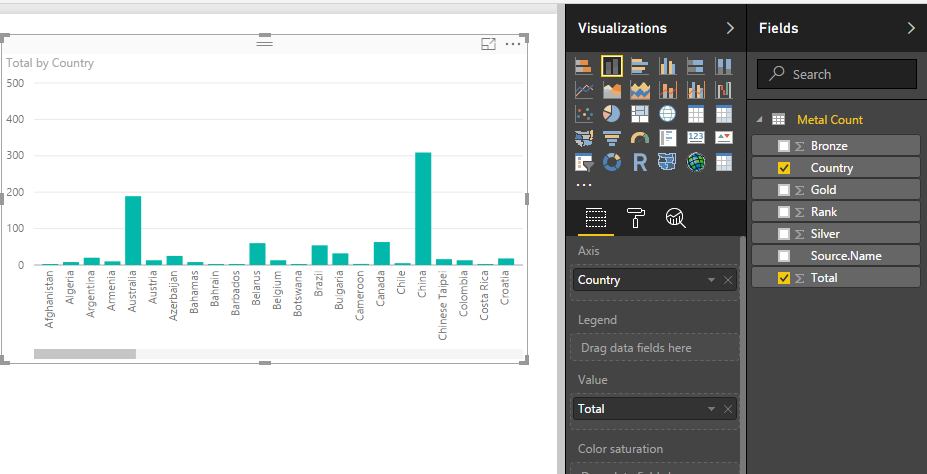
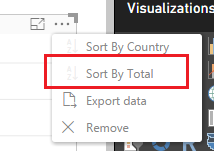
Click the Ellipsis on the upper right hand corner of the chart and select Sort By Total to sort all the items in the bar chart according to how many metals each country won.
Great we have made a parameter, loaded multiple excel files, and then made a visual of our data. Let’s test it out. Save your work and close the PowerBI desktop. (don’t forget to save your PBIX)
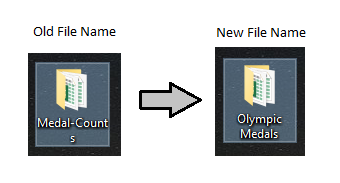
Next we rename the folder where all the excel files are contained. Change the name to Olympic Medals.
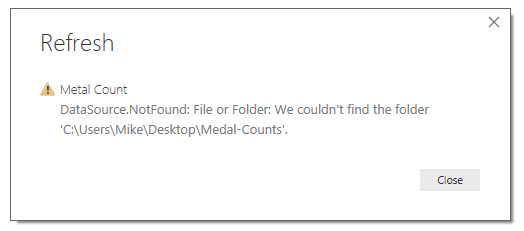
Reopen your PBIX file, on the Home ribbon click the Refresh button. Ooops, since we renamed the folder we now have an error.
To fix this click the bottom half of the Edit Queries button on the home ribbon, and select Edit Parameters. Then modify the Folder field to include the new name of the other folder Olympic Medals. Click OK to proceed.
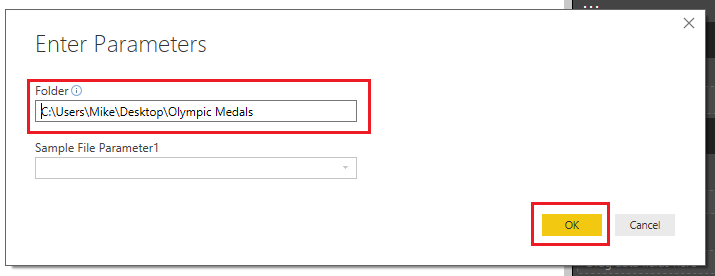
A message bar will appear under the Home ribbon. Click Apply Changes to complete the data load. PowerBI will reload all your data using the context of the new folder.
Now this is an elegant solution for sharing PBIX files and their corresponding data files with coworkers. This is just a simple example of how you would use parameters. There are a multitude of other really good use cases for using parameters within your queries. Thanks for reading along, be sure to share if you like this tutorial.