Power BI Connections: Import
Power BI’s default connection type is Import. In fact, if you have never dealt with a data source that handles multiple loading methods, you may never know that there are different loading methods because Power BI automatically connects via import. However, if you’ve ever worked with sourcing information from databases or models, then you have seen the option to select Import vs. Direct Query or Live Connection.
Note: This is a continuation of the Power BI Connections series. If you would like to read the overview of all the Power BI Connection types you can do so here.
Below is a quick chart to outline some of the considerations to help you decide whether import is right for you.

Connection Type Outline
Import is the only connection type that brings to bear the full capabilities of the Power BI Desktop. As you move from Import to Direct Query to Live Connection, you trade off ease of use for solutions that will scale.
Import will pull in the data from the data sources that you have connected to and store & compress the data within the PBIX file. The eventual publishing of the PBIX file will push the data to Azure services supported in the Power BI Backend. For more information on data movement and storage see the Power BI Security Whitepaper.
When using import, the full Edit Queries suite is available to mash up any data source, transform data-sets and manipulate the data in any way you see fit.
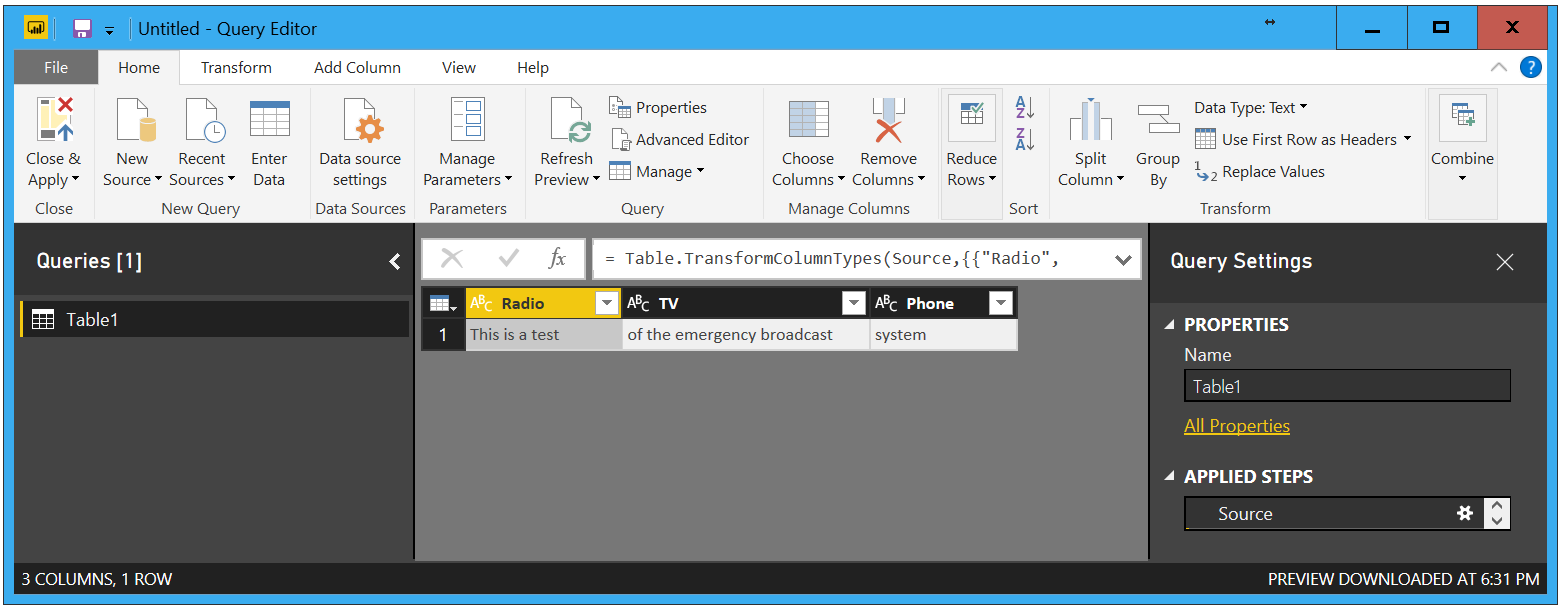
Query Editor
Once you click Close & Apply, the data is loaded into the “front end” of Power BI into the Vertipaq engine.
Note: The Vertipaq engine is used in both Excel and SQL Server Analysis Services Tabular models. In simple terms, it is the backbone that compresses all your data to make it perform extremely fast when visualizing, and slicing & dicing. For more detailed information on the engine see an excerpt from Marco Russo & Alberto Ferrari’s book “The Definitive Guide to DAX: Business intelligence with Microsoft Excel, SQL Server Analysis Services, and Power BI” found here.
At this point it is ready for you to extend by building out the relationships between your objects in the model section. After the model is set up you will now be able to add any additional calculations in the DAX (Data Analysis Expressions) formula language. There are two types expressions that you can create, measures and calculated columns. To create these, you can go to modeling, and select the option. When you do this, the formula bar will display. You can also right click on any column or field and select “New measure” or “New column” from those drop down lists.

New DAX Measure or Column
Other than the formula bar with intelli-sense, there are several built in tools that can help you build those calculations.
The first method is to Right Click on the desired field and select an implicit calculation from the drop down:
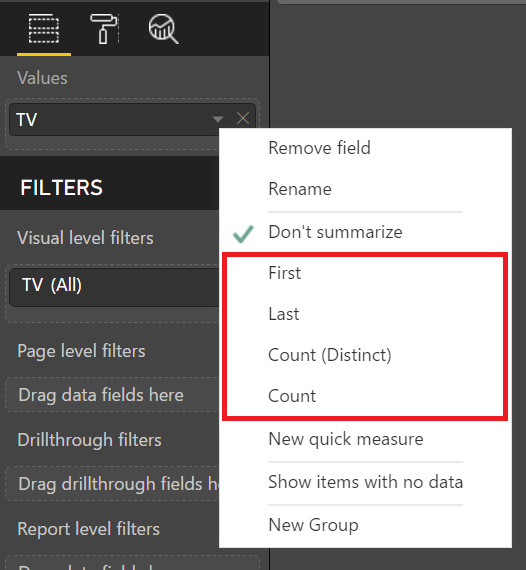
Using Implicit Calculations
The second is Quick Measures. This can be accessed by using right click as described above.
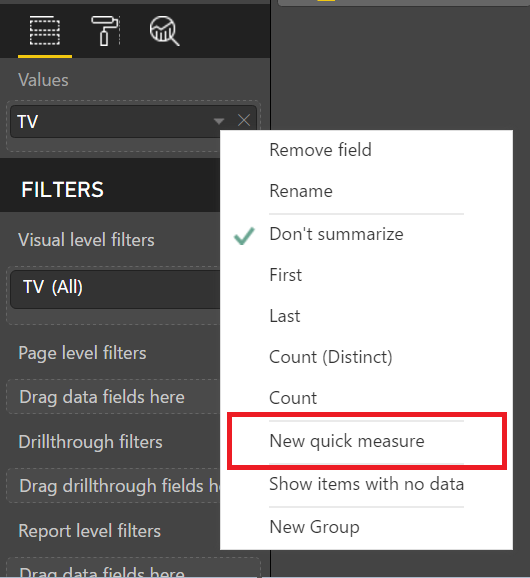
Using Quick Measures
Here is an example of the Quick Measure dialog box:
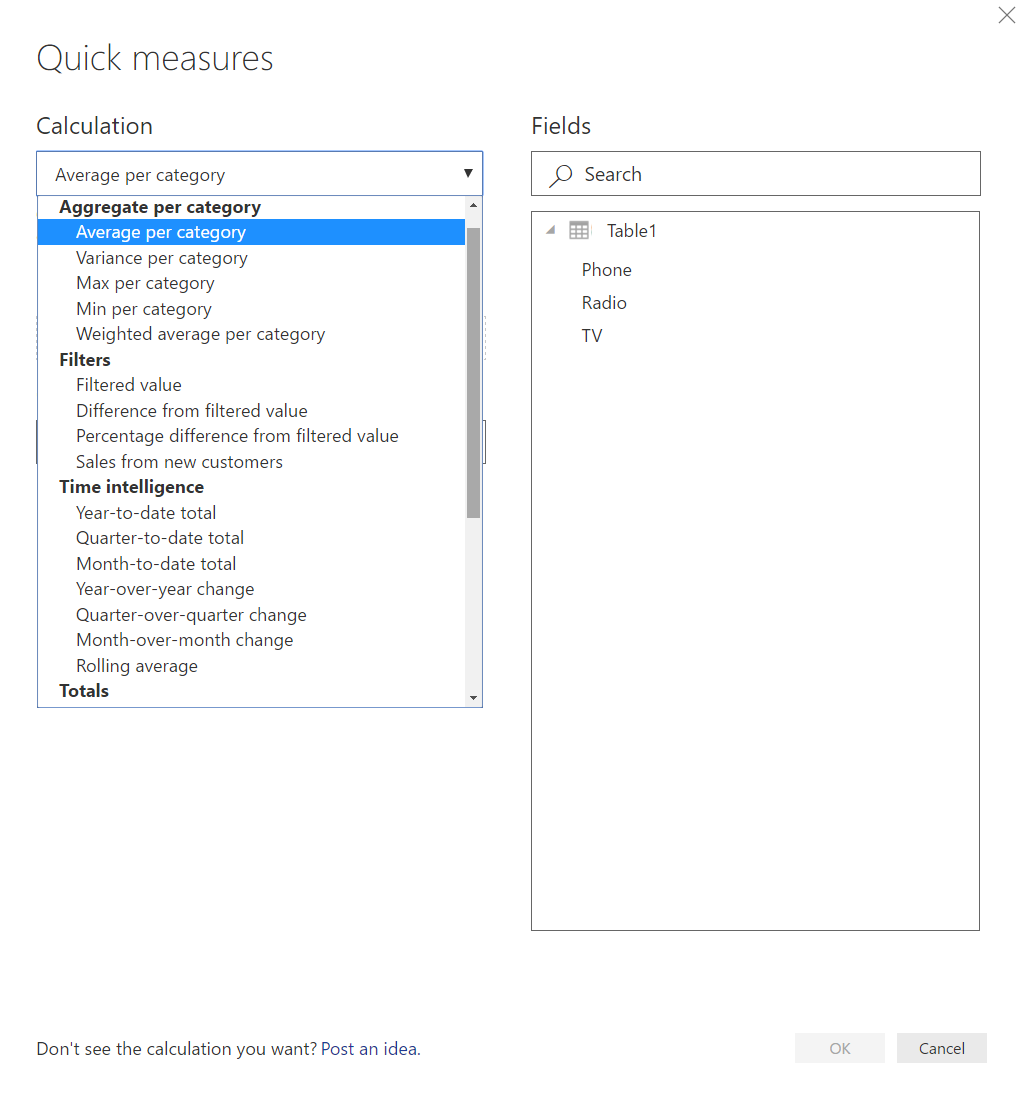
Quick Measure Dialog Box
Quick Measures allows you to choose from a wide variety of calculations to generate a measure. Once the measure is created, you can interrogate the measure and see the code that was generated. Click on the measure (denoted by a little calculator next to the text) created by the Quick Measure dialog box to see the DAX code.
Here is an example of what that looks like:

Sample of Quick Measure
This is a great method to get your feet wet while you’re learning DAX.
Note: there are a lot of safety features added to these Quick Measures, such as, an “if” statement wrapped in a “isfiltered”. You might have to remove these bits of code in order to play with the measure.
When you have completed your report and publish the report & corresponding dataset to the Power BI Service, you will need to schedule a refresh. This will be required for any report which relies on the Import Connection. There are numerous use cases that surround whether or not you need a gateway, but a simple rule applies. If the data comes from an on-premises source, you will need one, for cloud sources you usually do not, but you can find in depth refresh documentation here.
The Import connection has the least amount of restrictions between the three methods, Import, Direct Query, and Live Connection. However, there are a few Import restrictions you should be aware of.
First, depending on your data source and the size of the data set, the processing of the model could take a bit of time.
Second, since all the data is being loaded into a table, there is a limitation on how big the file can get for successful publishing to the Power BI Service. That limit is 1 GB for free users & Power BI pro users, 2 GB for Report Server Reports and for Premium Users the size is only bound by the amount of memory you have purchased.
Note: The PBIX file can get as large as you want, however, it won’t let you publish.
Using Import is good when:
- You can schedule your data to refresh
- Data only needs to be refreshed periodically
- Can be refreshed up to 8 scheduled refreshes in a day (restriction from Power BI Service)
- The amount of data your importing is relatively small (doesn’t need to scale)
- You need to mash up multiple sources such as Azure SQL database and google analytics data sources
In summary, the Import method is the most flexible, provides all the tools to connect, mashup, extend and visualize your datasets within the Power BI Desktop. It is likely the most used connection type and is the default for all connections. The data you connect to is drawn in, and a copy created and used in both the Desktop and the Service. Scheduled refresh is a requirement for almost all scenarios, and it is likely a gateway is required as well if your data is not located in the cloud.
