Icons upon Icons

I am just bursting with excitement!! This month the amazing Power BI team has yet again come out with a great new feature, Icon sets. In addition to this you can enhance these icon sets by adding your own custom icons to your Power BI reports. Woo Hoo….
So what does this mean? Well, now you have a new Conditional Formatting box found in the settings of the Table and the Matrix properties. To use a built in Icon from Power BI. Create either a table or a Matrix visual with some data.

Select the visual and adjust it’s properties by clicking on the Paint Roller and opening the Conditional Formatting window.

Scroll down until you see the toggle button for Icons. Turn the Icons On.

Click on the Advanced Controls to set the properties of the icons based on the data properties. This type of dialog box should look familiar as it is similar to the previous boxes for conditional formatting. Opening this window shows Icons for each Rule in the list. To adjust an icon Click on the Drop Down Arrow next to the icon you wish to change. There are multiple icons to choose from.

There are limited selections by default, but you can enhance this by adding your own icons with the custom Json theme files. At PowerBI.tips we love our theme files. They make using standard settings so much easier.
Loading the Custom Icons
For starters we have already done the hard work of creating an additional 50 icons for you to use in your reports. Download the Icon Theme File Here
Update: Special thanks to Reid Havens from Havens Consulting for contributing extra icons to this Icon Set.
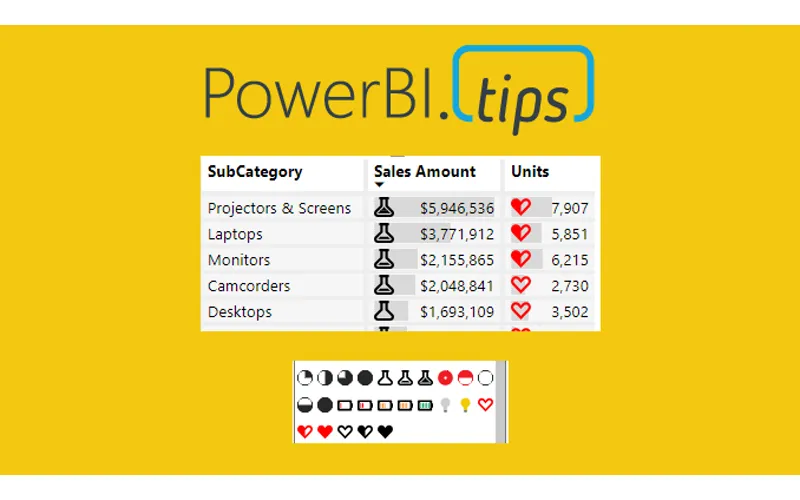
With this file you get these additional icons:
![]()
To add these additional icons follow these steps:
- Download the theme file -> Here
- Unzip the downloaded file to find the PowerBITips Icons v1.json file
- Navigate to the Home ribbon in Power BI Desktop
- Click on the Switch Theme button
- Select the list item Import Theme from the drop down menu
- The open file dialog box will open. Select the PowerBITips Icons v1.json file that you downloaded earlier.
Boom, and just like that you have loaded your new icons. Now you can return to the icons for your table or matrix and adjust until your heart is content.
Here is a sample of a table and a matrix with some custom icons applied:

Update 2019/08/06: When publishing the Power BI file to the PowerBI.com service, the fill colors for the shapes need to have a %23 instead of a # (HASH) infront of the HEX codes. Thus, the format should look like fill=’%23FF0000′ instead of fill=’#FF0000′
If you liked the tables from this blog they came from one of our Layouts that we produce. The Microsoft Layout September 2018, download it here.
