This tip outlines an easy deployment method for data tables that have been manually added to a model via “Enter data” in Power BI Desktop. This is a very effective method especially as it relates to large model deployments. The scenario is typically seen when you build data tables to support slicer/measure interactions. As those selections are made, each one of the values will generate a different DAX calculation to drive a different insight.
An example of that setup would look like this.
Create a data table
First, manually create a data table for slicer selections.

Create Measure and Slicer
Create a Measure that uses separate calculations ,and reference the data table in our slicer to determine which measure we want to display.
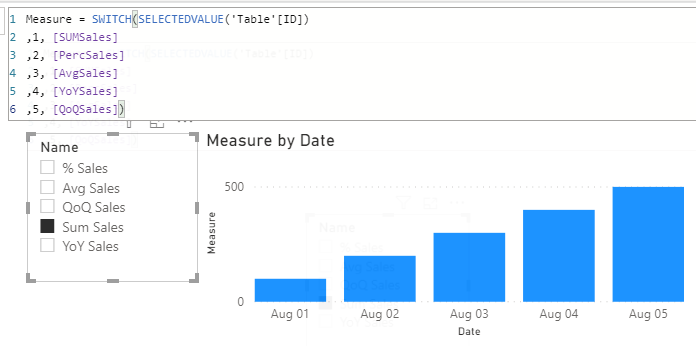
As seen above, the slicer has the value from the manually entered data. The id’s correspond to the measures you will want to display in the report visual.
This pattern gives an amazing amount of flexibility to use the same visual and look at different metrics within the same visual. This removes the need for bookmarks and more visuals for each calculation.
Typically, I deploy all my metadata changes via ALM toolkit. (I love that tool). However the slicer options and calculations in this method have a data element that needs to be refreshed as well. Which suggests I need to refresh the data model with these types of updates. However, I don’t want to refresh the entire model. So, I opened up my connection to my model in the Power BI Service to investigate.
You can connect to your Power BI workspace Analysis Services models by following these steps.
Connect to Analysis Services Model in Power BI
First ensure you have the XMLA endpoint enabled appropriately. This is under Settings > Admin Portal > Capacity Settings > (Select Capacity) > More Options > Workloads
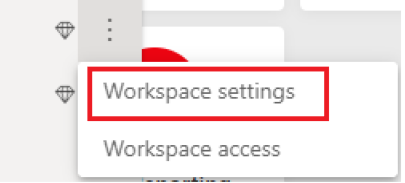
Once we have the capacity setup up. Copy the link from your Premium Workspace. Click on the ellipses next to the workspace and select Workspace settings.
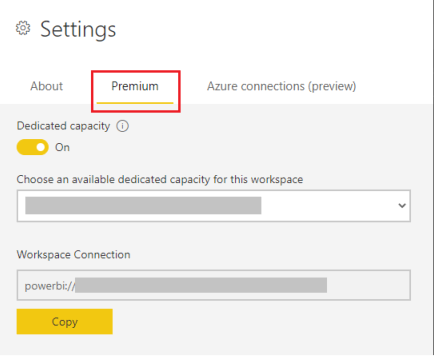
Under Settings Copy the Workspace Connection
Open SQL Server Management Studio and apply the connection string in the Server name: location. (Remove the ending of “Initial Catalog” if it is present initially. Set the Authentication to AAD-Universal with MFA and enter your user name (email address) in that section.

Locate the Code
After getting hooked up, my “There has got to be a way” hat went on and I started digging into the objects in SQL Server Management Studio (SSMS).
Mike and I noticed that the entire Power Query query is part of the connection within the table definition. Part of that query is the binary string used when a manual data table is created. Could it be, we could update the local PBIX, grab that binary code and replace the binary in this table!? “YES!”
Here is how you do that.
Right click on the table name > select “Script Table as” > select “CREATE OR REPLACE to” > select “New Query Editor Window” (SSMS hates screenshots apparently, so I could not snag them)
Now that you have the query open, scroll down till you see your Power Query code. Search for the very begining where you see the binary for your data table. Replace this binary string with the new string you have in your PBIX file.

Pay close attention that the binary is wrapped in ‘\’ in the front and before the double quotes at the end. You have to keep it that way or it will break your code.
Execute the query
Refresh your Power BI dataset table
Right click and select Process Table to refresh the data in the table. Choose Process Data
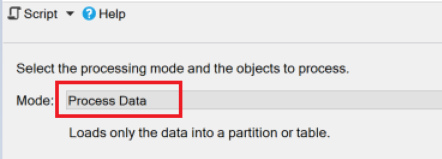
BAM! You’ve just updated the table in the Service without the need to refresh the entire model!
As a result of these findings, I’m very interested in what other parts of the Power Query connections we can update/modify. I think I’ll be exploring those further in the coming months. I am really excited that Power BI has moved onto the Tabular Object Model and we now have the ability to use XMLA read/write. There is so much flexibility and speed in our deployments now! We’re looking forward to finding new and interesting ways to push changes without the data. We hope you find this tip useful, thanks for reading.
Requirements for the above tutorial to work:
- Be using a Premium Capacity
- In your Power BI Desktop, enable the enhanced metadata format

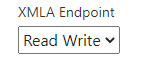
- Toggle on the XMLA Read/Write in the Power BI Service (described above)
If you like the content from PowerBI.Tips, please follow us on all the social outlets to stay up to date on all the latest features and free tutorials. Subscribe to our YouTube Channel, and follow us on Twitter where we will post all the announcements for new tutorials and content. Alternatively, you can catch us on LinkedIn (Seth) LinkedIn (Mike) where we will post all the announcements for new tutorials and content.
As always, you’ll find the coolest PowerBI.tips SWAG in our store. Check out all the fun PowerBI.tips clothing and products: