Search results for: “% change”

  • 8 Mistakes I made to Start Learning Power BI

    8 Mistakes I made to Start Learning Power BI

    If you want to start learning Power BI, or are looking to improve your skills, there are lots of areas you can start. However, learning itself is a skill. When I started out, I had a few things that slowed down my progress. These are eight common mistakes that I made when I started my journey of Power BI, and the lessons I learned along the way!

    note with the text "never stop learning" written on it

    1) Trying to Focus on Learning too Narrow

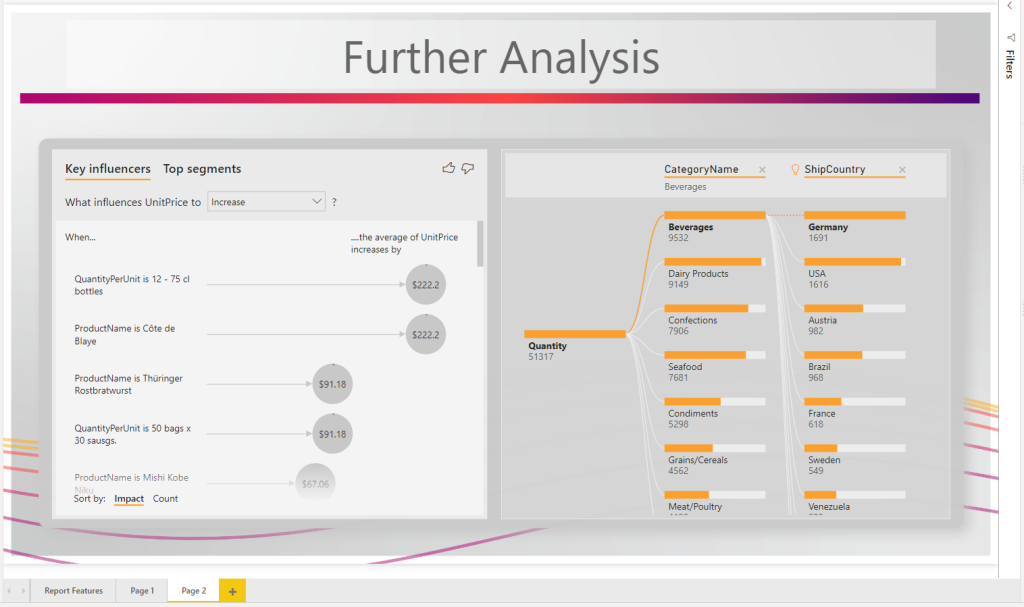
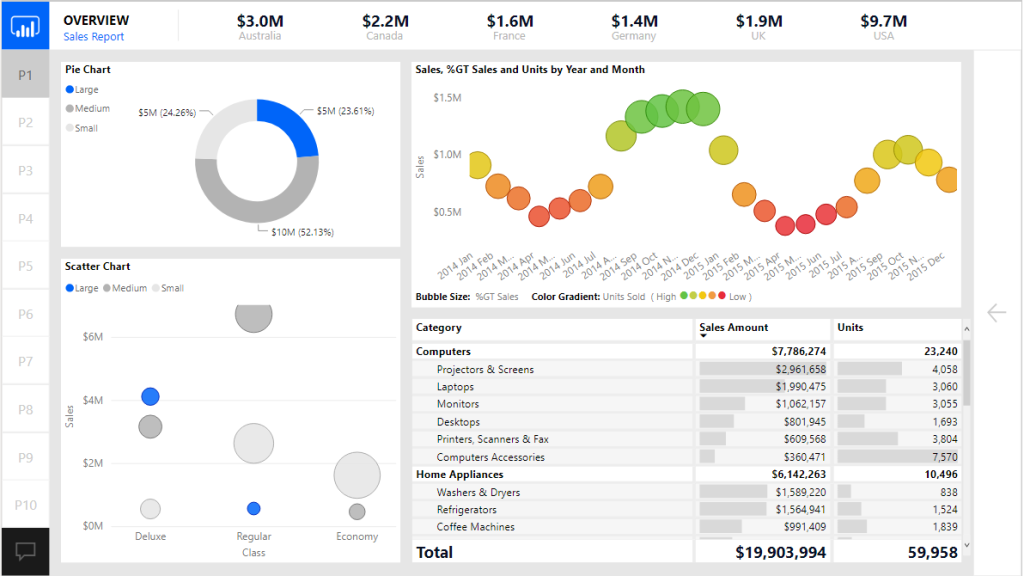
    There is a lot of areas to cover in Power BI. Most people see the visual design side of Power BI (being graphs and visuals). Yet, there is much, much more. Power Query and DAX are two detailed languages to learn in themselves. Next, there are tabular models and analysis services. Then you have the Power BI service, governance, and all things that come with software deployment. On top of that, all the third-party tools and add-ons.

    You do not need to master these, but you should have breadth in your learning. Understanding the fundamentals and basic concepts of each stage in Power BI. When starting out, I dived into Power Query and wanted to be an expert modeller. While this is not a bad idea, I neglected some basics of database design and governance. Without these, my skills were not complete enough to be considered an expert in any one aspect.

    Lessons Learned: See the bigger picture and start with the fundamentals. Don’t stop being a specialist if wanted, but get the basics covered first. Look at the skills matrix. Try to get to at least level 4/5 in each subject, then dive into the detail.


    2) Trying to Focus on Learning Everything

    A warning to the previous post, is to try and master all the areas. As I learned more, I thought learning Power BI required me to learn everything about it. Yet this was an unrealistic task. When I went to start learning Power BI, I tried to master Power Query, DAX, Analysis Services, design theory, governance among many more. The result is that I was taking on too much and forgetting most of what I had learned.

    Lessons Learned: Find your niche. You may love story telling, enjoy writing complicated Power Query or advising users on admin features. It is a careful balance to not focus on too narrow or too broad. Learning is an iterative process though. To find an area you excel at and enjoy the most, you need to experience more. First, learn the fundamentals and get a good breadth of knowledge. Next, get involved in your favourite areas and get a good depth of knowledge.


    3) Saying YES to every request

    This is one of the biggest mistakes I made (and see others make) when taking requests. Stakeholders requesting reports are often less versed in Power BI. As a result, they may not understand best practices or visual design theory. It happened a lot – they would ask for unique and specific requirements. I took it as a challenge to try and deliver exactly what they wanted. This often-meant creative hacks, crazy DAX, and bizarre uses of visuals.

    While I was pleased that I could stretch Power BI to meet users’ needs, I know now this was a bad approach. This resulted in hours of fixing the complicated visuals when things went wrong. Changes that should be small turned into complex projects.

    Leason learned: You are the expert for a reason. Knowing how Power BI should be used is an important skill. Being able to explain this and not over customizing reports is even more important. Learn how to take requests from users and understand what they really want. The story the report tells is much more important than the style of visuals on a page.


    4) Not Understanding enough about I.T. practices

    I came from a business side analytics role. I was a big excel user and loved creating complex and unique solutions to solve difficult problems. However, I did not know enough about I.T. best practices. These include DevOps, releases, or multiple environments (e.g. DEV, TEST, PROD).

    While I could develop reports, I did not know the processes to deploy them. I did not know how to thoroughly test.

    Lessons Learned: While you do not need to be an expert, you should know the basics. When you start learning Power BI, make sure you spend a bit of time understanding these. Moreover, contact your I.T. department and ask about the practices in your organization.


    5) Start Learning Power BI too advanced – not at the fundamentals

    I love learning new skills. The more complex, the better. Trying to learn the most difficult and complex tasks seemed like a clever idea to quickly advance and become a pro. Yet, the reality is a little different. You may have heard the phrase “Don’t run before you can walk”. By diving in too quickly to the complex tasks, I missed some fundamental knowledge. This slowed my learning down overall. Without that knowledge, I found it difficult to grasp the why. This doesn’t just apply to skills in Power BI Desktop, but fundamentals in databases and data transformation too.

    One area I did this is when I was learning to data model. I tried to learn all advanced methods and specialised tricks. I would find complex ways of doing powerful tasks. But without the fundamentals, I wouldn’t fully know the why. I learned replacing long text keys with integers was a good idea. Learning about data storage and the reasons behind this helped me know why to do this and understand the best methods.

    Lessons Learned: When you start learning Power BI make sure to learn the basics. Even as a seasoned developer, make sure you revisit them. Learn the fundamentals of skills such as databases or data storage. Learn about STAR schema, keys, dimension, and fact tables.


    6) Going too fast in learning DAX

    At the start, DAX seemed like the holy grail. It was familiar from an excel background. So, I set off to master it. It seemed simple enough to do.

    I was wrong. DAX is hard. In fact, DAX is extremely hard. Many beginners will say DAX is easy. Only until you learn DAX, you know it is not. While it may be easy to do some calculations, others can seem impossible. Writing DAX requires a knowledge of how it works. DAX also works differently to anything I have used before.

    The worst scenario is not knowing DAX’s difficulties. You may end up writing incorrect DAX, and not know it is wrong. Users will consistently come back saying the numbers are wrong. Eventually, people will stop trusting your reports. Luckily, you do not need to be an expert in DAX. You can be a great developer will reasonable skills.

    Lessons Learned: If you are struggling, first make sure you model is following best practices. This is the often cause of most DAX issues. If you want to be an expert, then great. This can be a valuable skill when you start learning Power BI. Otherwise, ensure you learn and re-learn the fundamentals. Read this article on the what the fundamentals are. Educate, practice the skills, then re-educate. Never stop learning DAX, and never stop visiting the fundamentals. Read this amazing article by SQLBI.


    7) Start Learning Power BI by Ignoring best practices

    Learning new skills is fantastic and often I was eager to show them off. The more complicated an answer was, the more I wanted to include it in a report. This gave me great confidence and made me feel like I really knew the subject.

    However, this rarely translated into better reports. What I found was changes became difficult to make. Additionally, reports would break in the future. Minor changes and growing data would often mean repair was needed for the reports. Ignoring modelling standards such as STAR schema resulted in hours spent in DAX.

    Lessons Learned: Learn the best practices and religiously follow them. Microsoft have an excellent resource for this. Simple is often better – you want to design reports that are robust, and users can trust will not break.


    8) Start Learning Power BI without asking for help

    There are lots of areas you can start with in Power BI. To be a great developer, it takes knowing lots of different skillsets. While there is a great deal of paid training, this may not be available to everyone. Self-training is an effective way to learn, but everyone will need some help sometimes. Thankfully, the Power BI community is an outstanding community. There are some amazing people who spend their time helping others. Yes, it is important to learn by making mistakes and figuring things out on your own. However, if you are really stuck on a problem or concept, reach out for help before getting slowed down or frustrated.

    Lessons Learned: Knowing how and where to ask for help, however, is important. Even if someone likes to help a lot, sending unsolicited messages to people you do not know can come off rude and annoying. Luckily, there are a number of places you can go for help:

    Community.PowerBi.com – This is the first place to go for specific questions when stuck. Please don’t treat this as a place for free consulting, but rather to help you understand concepts you are stuck on.

    User Groups – These are great to join and attend monthly meetings. They normally have a local community that include all levels of knowledge – great for learning and asking questions.

    Social Media – There are a number of active communities. There is a great Reddit group and some active users on Twitter. In addition, LinkedIn has many users who love to share knowledge (feel free to follow myself or PowerBI.tips too!).


    Conclusion

    It can sometimes be overwhelming to know where to start in a new skill. There is a phenomenon called the Dunning-Kruger effect. This is the effect that often, when you start learning, it will feel easy. However, as you learn more, you realise how much knowledge there is and feel there is so much you don’t know. Please, do not let this put you off. This is a very common feeling that almost everyone goes through.

    Instead, focus on getting great at the basics. Keep it simple and to things you can complete. Reach out, join the community, and ask questions. Of course, most of all, have fun!

  • Standardizing KPI’s around a Business Intelligence Team

    Standardizing KPI’s around a Business Intelligence Team

    This article follows from Episode 5 of the new Explicit Measures Podcast, a whole new way to talk about Power BI. If this article strikes you as relevant, subscribe to the podcast on Spotify, Apple, or wherever you listen. You can also watch live at 7:30am CST every Tuesday and Thursday morning on YouTube.

    On the latest Explicit Measures Podcast (Episode 5), the team dived into what should a BI Team focus on for their own KPI’s. One theme was consistent across each host however: Any KPI for a BI Team starts with the question: how do you evaluate and define success? This idea of success and the value for a Power BI pro can fall into many different opinions, depending on the size, team, and current culture at an organization. We wanted to share an initial template of KPI’s that any BI Team or Pro should start using and integrating in their own workflow.

    Evaluating Success for Power BI

    How can you properly gauge whether reports and data is satisfying the role in a company? At least from the opinion of the Explicit Measures Podcast, the basis starts with the ability to provide value, trust, and insights to an organization through their data. Starting with this as the end-goal, a BI Team can and must strategize on translating success into measurable targets. Let’s break this out into three distinct elements of success, with examples of KPIs for a BI Team.

    Elements of Success

    Adoption

    Adoption has become a buzz word in our industry over the past few years, and with good reason. One could make the argument that the ability to drive adoption should take higher precedent than some of the reports themselves. For reference, we are defining adoption as the maturity, growth, and reliance an organization has on their data via Power BI.

    Value / Time

    While most BI professionals do not directly create revenue, there is no question that there is a cost. With an ever increasing workload and requests for our time, the ability to validate and choose to work on impactful and value-added reports is essential. If a pro is working on one report, there are five others that are being ignored. Further, are the reports that are being developed and deployed providing the expected insights and information to an organization?

    Data Quality

    Anyone who has worked in Business Intelligence can tell you – once teams lose trust in the data, it is an awfully long and difficult road to gain it back. If users cannot trust the data in Power BI reports, that both reverts adoption and users will find other means to get their data. BI teams must be able to monitor how up-to-date published reports are, and ensure that the content that is available is current and accurate.

    Examples of Success KPI’s

    The following are examples of what a Power BI team or Pro can use to evaluate their own success based the pillars of Adoption, Value, and Quality. This is by no means an exhaustive list – this is an amazing community that consistently contributes new and innovate ideas – however there is no current standard for a BI Team success KPIs.

    An Example BI Team Scorecard using the new Goals in Power BI

    Adoption – KPI’s

    Rolling 14 Days / 30 Days Report Views

    Just with a basic department metric, simply looking at the aggregate does not create a KPI. While Report Views are important, giving context to the current performance transforms how you view this. This KPI not only shows you your top reports on a 2 week and month period, but also compare with the previous 14 / 30 day period.

    Viewing Report Usage on a 30 Day Rolling Basis

    Active Users (Weekly, Monthly)

    The relationship between the number of Report Views and Users may not be as straightforward as you think. Keeping watch of engaged consumers should occur on a weekly and monthly timeframe. For this, you can simply use a filter on a minimum of X reports viewed per week or month. Depending on your data, you can gauge the current state.

    User Distribution by Report

    Do not be fooled by high usage numbers in your reports alone! By this, make sure you can identify power users who are hoarding the majority of views for a given report. For example, a great technique to understand this is using the Pareto Principle, or the 80/20 rule in your report views. For example, for your top report, try to track the 20% users, and how much of total views they make up for an entire user base.

    SAT Scores, Feedback

    The majority of the KPIs in this article focus on quantitative metrics. However, there should attention to create subjective feedback in Power BI. For example, creating a Power BI Feedback Survey can create high value. In regard to when to send out a Survey, the following scenarios are suggested:

    • 45 Days after New Reports Launched (per-Report Feedback)
    • Quarterly Feedback Surveys (Overall experience using Power BI)

    Collecting this data via Power Automate and integrating into Power BI becomes a powerful tool.

    Using Customer Voice to Send out Report Feedback Surveys using Variables for Report Name

    Value / Time – KPI’s

    New Reports Launched

    Like Supply Chain Management, ensure you can track newly published reports. Bear in mind, this is not a growth target. There should be some range depending on the size of the BI Team that should aimed for. For example, a consistent small number may show a backlog. However, to high of a number may be saturating the overall experience for users.

    New Report Usage

    In parallel with tracking newly published reports, keep an eye on the immediate interest from consumers for these new reports. Like with the New Reports Launched KPI, depending on your team and size, decide on a sweet spot regarding range of views you expect. Likewise, have a filter on this based on the date the report was launched, looking at 30 to 45 days forward. The only usage metrics that should be included are ones based on the date the report was published.

    Report Lifespan

    This is a favorite. Too many times has a BI Author worked on what was deemed an urgent report, imperative to the business. These types of projects involve stress, pressure, and most importantly time taken to get right. Despite this, some of these reports seem to lose their luster once completed, not to be heard from again.

    In short, the ability to understand the durability and longevity of reports is essential. This can be taken both from viewing at an individual report level or an aggregate of newly launched reports. Are the reports being built showing value to consumers, not just once, but giving them a reason to return to the report on a consistent basis?

    Data Quality – KPI’s

    Report Refresh Rate

    An obvious choice when referring to Data Quality, if your reports are consistently failing that causes multiple problems. For one, consumers are not receiving the most current data. Secondly, this should trigger within the BI Team an alert that a data model may need to be reviewed for best practice standards.

    What is the target rate? While there is no current industry standard, targeting anything near the 95% rate should not be over achievable.

    An Example of Report Refresh KPIs

    Days Since Report Views

    From a bird’s eye view of all the reports in an organization, flagging unused report becomes an actionable KPI. In addition, mapping this to also track duration on a per-user basis provides a wholistic scorecard to future decisions. Firstly, Reports with consistent low Days Since Views should be treated with extra care if any updates are needed. On the other hand, Reports that have not been viewed in over 2 weeks may indicate loss of interest. Depending on the report, a BI Team can decide either to re-promote a report or assess if a report is not providing the value it should.

    From the User perspective, tracking Days Since Views by User can provide value in multiple ways. For instance, Users who are “top customers” (i.e. those who overall and per-report have low Days Since Views) tell Authors who to reach out to or who knows what can enhance reports in the future. By contrast, Users with high Days Since Views provide the ability for push-back for requests for new builds. For example, any colleague that may be requesting the most report builds but do not return to their reports give support to Project Managers that this may not be worth the value.

    Flagging a Report with 40 Days since being viewed by User

    Reports Retired

    As we discussed monitoring how many Reports have been launched, what about Reports on their way out? That is to say, how many reports have been removed from the service and from the “public” view. The importance of keeping track of this KPI is all about quality for the consumer experience.

    Ensuring that any data published for an organization is current, has a clear objective, and provides clarity is paramount. Above all, this grows the trust and reliance on using Power BI for users. From a discovery standpoint, there is no confusion on reliable data.

    Taking the previous KPI (Days Since Views) into account, a BI Team can create a view to monitor “at-risk” reports. For example, any Report with over 45 Days Since Views should be strongly considered to be retired. Any report that meets the threshold should alert users on a pending retirement date. If there are no objections, then these reports should be moved to an Archived workspace.

    Getting the Data from Power BI

    This may be obvious, but a prerequisite of creating and using KPI’s is having the data. So where is this data coming from? If you are a Power BI Administrator in your tenant, you can import the data via PowerShell. Install the Power BI Module in PowerShell using the following command:

    Install-Module -Name MicrosoftPowerBIMgmt

    Once you installed the cmdlet, you can use the following script to pull in usage day (by day) into a specified folder on your PC.

    Login-PowerBI
    ## $a is the starting Day. Start with the you want it run and subtract 1
    $a = 17
    Do {
        "Starting Run $a"
        $a
        $a++
        $ab = "{0:00}" -f $a
        "Running Day $a"
        $daytype = "$ab"
        ## Update monthly the 05 for start date for the current month
        $startdate = '2021-05-' + $daytype + 'T00:00:00'
        ## Update monthly the 05 for end date for the current month
        $enddate = '2021-05-' + $daytype + 'T23:59:59'
        $activities = Get-PowerBIActivityEvent -StartDateTime $startdate -EndDateTime $enddate | ConvertFrom-Json
        ## Update the 05 with the current month
        $FileName = '2021' + '05' + $daytype + 'Export.csv'
        ## Add where you want the files to go
        $FolderLocation = 'C:\Users\PBIActivity\'
        $FullPath = Join-Path $FolderLocation $FileName
        $activities | Export-Csv -Path $FullPath -NoTypeInformation
        ## Change the number for what day of the month you want it to run until
    } Until ($a -gt 19)

    The script above collects activity data from your tenant and creates a CSV file per day. Note that this can only go back 30 days – make sure you run this on a weekly basis and change the variables. To learn more about what else you can do with the PowerShell cmdlets for Power BI, read the announcement from the Power Blog here.

    To collect refresh statistics, Marc Lelijveld (Data-Marc) has a great tutorial here.

    Conclusion

    The KPIs outlined should serve as a starting point to monitor performance. Power BI Pros without insight into their own performance are stunting their own growth. Not only are metrics for Pros essential for an organization, but it alters the way new reports are built in the future.

    Like the content here? Then you will love the Explicit Measures Podcast!  Subscribe to the Podcast on Spotify, Apple or multiple platforms on Anchor. Want to join us live? We stream every episode on YouTube Tuesdays and Thursdays at 7:30 am CST. You can also subscribe to new events on the PowerBI.tips LinkedIn Page

    If you like the content from PowerBI.Tips please follow us on all the social outlets. Stay up to date on all the latest features and free tutorials.  Subscribe to our YouTube Channel.  Or follow us on the social channels, Twitter and LinkedIn where we will post all the announcements for new tutorials and content.

    Introducing our PowerBI.tips SWAG store. Check out all the fun PowerBI.tips clothing and products:

    Check out the new Merch!

    Hasta La Vista Data
    Go Ahead Make My Data
    PBIX Hat


  • Split an existing Power BI file into a model and report

    Split an existing Power BI file into a model and report

    Shared datasets are a great way to share data models across the organization. This enables users to maintain one source of the truth and increase efficiency. However, models should be built separate to reports. Meaning it can be difficult to transform an existing report into a shared dataset.

    This post describes how to split a pbix file with report and model, into two separate files One for the model and one for the report. This is accomplished using a PowerShell Script. By using this technique any report can quickly be split into a data model file and live connection report file.

    Note: that this script is not officially supported by Microsoft. This code is provided as is without any guarantees. The code will alter the internal files, so please keep a backup if you are unsure of anything.

    Think like the Business, Act like I.T

    Being a great Power BI developer can often mean more than just building visually impressive reports. Focus should be given to efficiency, reusing design and data modelling where possible. In addition, there should be “one source of the truth” – different reports should not have different methods to calculate the same KPI.

    This is accomplished by the creation of Shared Datasets. Users can publish a report that contains no visuals, only a data model. Multiple reports can then be built off this model by using a live connection and use the same data model. The model contains global measures. A Global measure is written and stored in the model file. Then the Global measures are re-used by other reports via the Live Connection. This ensures all reports have the same data model, logic and refresh status.

    There are many reasons you should consider this approach, which is out of scope for this article. If you are less familiar with shared datasets, I encourage you to visit the following resources:

    Think like the Business, Act like I.T user group – global models

    Power BI datasets: A Method to the Madness article

    Planning A Power BI Enterprise Deployment whitepaper DOWNLOAD
    ( Chris Webb and Melissa Coates) – section 9

    Use Cases

    Shared datasets are great, but what if you already have a file with a model and report in one? Currently in order to split a file this would need to be manual, by either copying all the visuals over to a new report (you would also need to re-record any bookmarks, filters, layouts etc. ) or to copy all the Power Query queries (you would then need to set up relationships and re write all measures). This can be time consuming, especially on a large report or model.

    Luckily for you, this code will do all the hard work for you. Simply run the code and select a PBIX file. It will create two new files, a report and a model.

    Running the code

    Right click and select the option Run with PowerShell in the menu.

    A menu will open up. Select the power bi file that you wish to split.

    Click the button OPEN to allow the script to modify your file.

    The script will then create two copies of the file and add the suffix _model and _report. Feel free to rename these, if you desire.

    Publishing to the Service

    Model File

    Open the _model file. It’s a good idea to add some text to the report explaining this is only a model file, so others understand the purpose. Example:

    Publish this file to the desired workspace.

    Report File

    Open the _report file. The script will leave all visualizations and report features intact, but all connections will be removed. When you open the report in power bi desktop, all visuals will appear broken:

    If prompted, make sure you discard changes – this will completely detach the report from the source.


    Click Get Data and Select Power BI Datasets.

    In the pop up window, select the model report you published in the previous step. This will now restore all visuals to display again.

    Publish the report to the desired location.

    That’s it! you can now share your new model file and continue to build reports off it.

    Download the Script

    You can download the script described below

    Download the PowerShell file and save it to your local machine.

    Script

    #This script was designed by Steve Campbell and provided by PowerBI.tips
    #BE WARNED this will alter Power BI files so please make sure you know what you are doing, and always back up your files!
    #This is not supported by Microsoft and changes to future file structures could cause this code to break
    
    #--------------- Released 6/2/2020 ---------------
    #--- By Steve Campbell provided by PowerBI.tips ---
    
    
    #Choose pbix funtion
    Function Get-FileName($initialDirectory)
    {
        [System.Reflection.Assembly]::LoadWithPartialName("System.windows.forms") | Out-Null
        
        $OpenFileDialog = New-Object System.Windows.Forms.OpenFileDialog
        $OpenFileDialog.initialDirectory = $initialDirectory
        $OpenFileDialog.filter = "PBIX (*.pbix)| *.pbix"
        $OpenFileDialog.ShowDialog() | Out-Null
        $OpenFileDialog.filename
    }
    
    
    #Error check function
    function IsFileLocked([string]$filePath){
        Rename-Item $filePath $filePath -ErrorVariable errs -ErrorAction SilentlyContinue
        return ($errs.Count -ne 0)
    }
    
    
    #Function to Modify files
    Function Modify-PBIX([string]$inputpath, [string[]]$filestoremove){
    
        #Make temp folder
        $temppth = $env:TEMP  + "\PBI TEMP"
        If(!(test-path $temppth))
        {New-Item -ItemType Directory -Force -Path $temppth}
    
        #Unpackage pbix
        $zipfile = ($inputpath).Substring(0,($inputpath).Length-4) + "zip"
        Rename-Item -Path $inputpath -NewName  $zipfile
                  
        #Initialise object
        $ShellApp = New-Object -COM 'Shell.Application'
        $InputZipFile = $ShellApp.NameSpace( $zipfile )
    
        #Move files to temp
        foreach ($fn in $filestoremove){ 
           $InputZipFile.Items() | ? {  ($_.Name -eq $fn) }  | % {
           $ShellApp.NameSpace($temppth).MoveHere($_)   }  
        }
        
        #Delete temp
        Remove-Item ($temppth) -Recurse
        
        #Repackage 
        Rename-Item -Path $zipfile -NewName $inputpath  
    }


    #Choose file
    try {$pathn = Get-FileName}
    catch { "Incompatible File" }
    
    
    #Check for errors
    If([string]::IsNullOrEmpty($pathn )){            
        exit } 
    
    elseif ( IsFileLocked($pathn) ){
        exit } 
    
    #Run Script
    else{    
    
        #set variables
        $modelfiles   = @( 'SecurityBindings', 'Report')
        $reportfiles   = @('Connections','DataModel',  'SecurityBindings')
        
        #Copy files
        $pathf = Get-ChildItem $pathn
        $reportname = [io.path]::GetFileNameWithoutExtension($pathn)
        $model = ($pathf).toString().Replace('.pbix', '_model.pbix')
        $report = ($pathf).toString().Replace('.pbix', '_report.pbix')    
        Copy-Item $pathn -Destination $model
        Copy-Item $pathn -Destination $report
    
        #modify files
        Modify-PBIX $model $modelfiles
        Modify-PBIX $report $reportfiles
        
    }


    Script Usage License

    Permission is hereby granted, free of charge, to any person obtaining a copy of this software and associated documentation files (the “Software”), to deal in the Software without restriction, including without limitation the rights to use, copy, modify, merge, publish, distribute, sublicense, and/or sell copies of the Software, and to permit persons to whom the Software is furnished to do so, subject to the following conditions:

    The above copyright notice and this permission notice shall be included in all copies or substantial portions of the Software.

    THE SOFTWARE IS PROVIDED “AS IS”, WITHOUT WARRANTY OF ANY KIND, EXPRESS OR IMPLIED, INCLUDING BUT NOT LIMITED TO THE WARRANTIES OF MERCHANTABILITY, FITNESS FOR A PARTICULAR PURPOSE AND NONINFRINGEMENT. IN NO EVENT SHALL THE AUTHORS OR COPYRIGHT HOLDERS BE LIABLE FOR ANY CLAIM, DAMAGES OR OTHER LIABILITY, WHETHER IN AN ACTION OF CONTRACT, TORT OR OTHERWISE, ARISING FROM, OUT OF OR IN CONNECTION WITH THE SOFTWARE OR THE USE OR OTHER DEALINGS IN THE SOFTWARE.

    If you like the content from PowerBI.Tips please follow us on all the social outlets. Stay up to date on all the latest features and free tutorials.  Subscribe to our YouTube Channel.  Or follow us on the social channels, Twitter and LinkedIn where we will post all the announcements for new tutorials and content.

    Introducing our PowerBI.tips SWAG store. Check out all the fun PowerBI.tips clothing and products:

    Check out the new Merch!

    Hasta La Vista Data
    Go Ahead Make My Data
    PBIX Hat


  • Hot Swap Power BI Report Connections

    Hot Swap Power BI Report Connections

    Let’s say you have a Power BI file connected to an Analysis Services machine. Then you want to change the data source to PowerBI.com using a Live Connection. Well, you are out of luck. Until NOW!!

    This post describes how to remove a connection from a report using a PowerShell Script. This means any source you can just delete the data source and then re-point your report.

    Note: that this script is not officially supported by Microsoft. This code is provided as is without any guarantees. The code will alter the internal files, so please keep a backup if you are unsure of anything.

    Use Cases

    Image the following diagram. Here we have a Power BI Report Connected to an analysis services model. Now, you wish to re-point the model to a Power BI dataset.

    Note: we assume the analysis services model and the Power BI dataset model have the same definition. Meaning all the columns and measures are the same.

    The below script removes connections Power BI Report.

    Download Script

    Download the Power Shell Script here

    Note: Running it on a file without a live connection will not have an effect on the file.

    Running the code

    Download the PowerShell file and save it to your local machine.

    Right click and select the option Run with PowerShell in the menu.

    A menu will open up. Select the power bi file that you wish to remove the connection from.

    Click the button OPEN to allow the script to modify your file.

    The script will leave all visualizations and report features intact. But, all connections will be removed. When you open the report again in power bi desktop, all visuals will appear broken:

    This is because you have removed all data from the report. Select a new data source to connect the report to. If the new source matches the names of the columns and measures used in the visuals, they will all repopulate.

    How the Code Works

    Internally, PBIX files contain a selection of metadata and media files. The files are zipped and packaged into a pbix file.

    The PowerShell script will alter these internal files, removing the Connections file which holds the information to the live connection.

    It then removes a security file, SecurityBindings, that is necessary to remove in order to not corrupt the file. SecurityBindings will be repopulated the next time you edit and save the file.

    Script

    #This script was designed by Steve Campbell and provided by PowerBI.tips
    #BE WARNED this will alter Power BI files so please make sure you know what you are doing, and always back up your files!
    #This is not supported by Microsoft and changes to future file structures could cause this code to break
    
    #--------------- Released 5/28/2020 ---------------
    #--- By Steve Campbell provided by PowerBI.tips ---
    
    
    #Choose pbix funtion
    Function Get-FileName($initialDirectory)
    {
        [System.Reflection.Assembly]::LoadWithPartialName("System.windows.forms") | Out-Null
        
        $OpenFileDialog = New-Object System.Windows.Forms.OpenFileDialog
        $OpenFileDialog.initialDirectory = $initialDirectory
        $OpenFileDialog.filter = "PBIX (*.pbix)| *.pbix"
        $OpenFileDialog.ShowDialog() | Out-Null
        $OpenFileDialog.filename
    }
    #Error check function
    function IsFileLocked([string]$filePath){
        Rename-Item $filePath $filePath -ErrorVariable errs -ErrorAction SilentlyContinue
        return ($errs.Count -ne 0)
    }
    
    
    #Choose file
    try {$pathn = Get-FileName}
    catch { "Incompatible File" }
    
    
    #Check for errors
    If([string]::IsNullOrEmpty($pathn )){            
        exit } 
    
    elseif ( IsFileLocked($pathn) ){
        exit } 
    
    #Run Script
    else{    
       
        #Unzip pbix
        [Reflection.Assembly]::LoadWithPartialName('System.IO.Compression')
        $zipfile = $pathn.Substring(0,$pathn.Length-4) + "zip"
        Rename-Item -Path $pathn -NewName  $zipfile
    
        #Delete files
        $files   = 'Connections', 'SecurityBindings'
        $stream = New-Object IO.FileStream($zipfile, [IO.FileMode]::Open)
        $mode   = [IO.Compression.ZipArchiveMode]::Update
        $zip    = New-Object IO.Compression.ZipArchive($stream, $mode)
        ($zip.Entries | ? { $files -contains $_.Name }) | % { $_.Delete() }
    
        #Close zip
        $zip.Dispose()
        $stream.Close()
        $stream.Dispose()
    
        #Repackage and open
        Rename-Item -Path $zipfile -NewName $pathn 
        Invoke-Item $pathn 
    }

    Editing the Code

    The code runs on PowerShell. PowerShell is a cross-platform task automation and configuration management framework, consisting of a command-line shell and scripting language.

    If you want to view or edit the code, first open PowerShell ISE. We recommended to run as administrator. Afterwards, you can paste the code below into the editor.

    Other Considerations

    The script can be useful when using two power bi files for development and deployment to the PowerBI.com service. In this use case you will have one Power BI that is the bifurcated model and one report that has just report pages. To speed up development you can Open both the Model file and the Report file. The Report file can point to a LocalHost version of the running Analysis Services.

    Here is an example of what this architecture would look like.

    Script Usage License

    Permission is hereby granted, free of charge, to any person obtaining a copy of this software and associated documentation files (the “Software”), to deal in the Software without restriction, including without limitation the rights to use, copy, modify, merge, publish, distribute, sublicense, and/or sell copies of the Software, and to permit persons to whom the Software is furnished to do so, subject to the following conditions:

    The above copyright notice and this permission notice shall be included in all copies or substantial portions of the Software.

    THE SOFTWARE IS PROVIDED “AS IS”, WITHOUT WARRANTY OF ANY KIND, EXPRESS OR IMPLIED, INCLUDING BUT NOT LIMITED TO THE WARRANTIES OF MERCHANTABILITY, FITNESS FOR A PARTICULAR PURPOSE AND NONINFRINGEMENT. IN NO EVENT SHALL THE AUTHORS OR COPYRIGHT HOLDERS BE LIABLE FOR ANY CLAIM, DAMAGES OR OTHER LIABILITY, WHETHER IN AN ACTION OF CONTRACT, TORT OR OTHERWISE, ARISING FROM, OUT OF OR IN CONNECTION WITH THE SOFTWARE OR THE USE OR OTHER DEALINGS IN THE SOFTWARE.

    If you like the content from PowerBI.Tips please follow us on all the social outlets. Stay up to date on all the latest features and free tutorials.  Subscribe to our YouTube Channel.  Or follow us on the social channels, Twitter and LinkedIn where we will post all the announcements for new tutorials and content.

    Introducing our PowerBI.tips SWAG store. Check out all the fun PowerBI.tips clothing and products:

    Check out the new Merch!

    Hasta La Vista Data
    Go Ahead Make My Data
    PBIX Hat


  • Scrims Instructions

    Scrims Instructions

    Thanks for your interest in our product Scrims. For more details on what is a scrim click this link to Learn More.

    Download a scrim from the products page. You can access all the available scrims here.

    Instructions

    After downloading, you will have a Zip file stored on your computer. Right Click on the zip file and Select the option Extract All from the drop down menu.

    Right click menu option Extract All

    The extract compressed folder menu will appear. Click on the Extract button found in the bottom right corner of the menu.

    Extract Compressed folder dialog box.

    A new folder will be extracted to the location noted in the previous menu screen. Open the newly created folder. Within this folder you will find all the images for the Scrims and a JSON theme file to use within your report.

    Folder contents, Scrims images, links to instructions, terms & conditions, and color theme file.

    When working with scrims it is helpful to see which image contains the the correct background layout for each of your pages. I find that it is helpful when reviewing images as Extra large icons. To turn this on, Open the View ribbon in the File Explorer. Then in the Layout window select the option titled Extra large icons.

    Change view of File Explorer to Extra Large Icons

    Add Scrims to Report

    Open a Power BI report in the Power BI Desktop application.

    Image of a Power BI report in Power bi desktop

    Note: Reports do not necessary have to be brand new. You can use scrims on existing reports. For illustration purposes an existing report was opened with only visuals. The remainder of this tutorial will show you how to add scrims to a pre-developed report.

    Click on the Paint Roller button. Then Open up the Page background item in the menu options. Click on the option labeled Add image.

    Note: for these options to appear you have to have a report open and none of the visuals selected on the page.

    In the open file selection dialog box pick the scrim that you want to load. Click on Open to load the image to the report page.

    The image will not initially appear. This is because the default settings for background are set incorrectly for this feature. Change the transparency to 0% and adjust the Image Fit to the drop down option of Fit.

    Note: Images provided in scrims are larger than the report page pixel size. This is because in order for the images to not look blurry we have to supply a larger image. The Fit feature then scales the image back down to the report canvas size but retains a crisp and clean look.

    Our report should now look similar to the following:

    Add JSON Themes

    Initially the visuals will not be formatted for the style of the report. We can control this by using a JSON theme file to pre-format some options for the visuals.

    On the View ribbon, select the Drop Down Arrow icon. Then Select the option at the bottom of the menu titled Browse for themes…

    Navigate to the scrims download folder and add the supplied theme with scrim download.

    This will apply formatting for the colors and some Visual style properties.

    Clean up Visuals

    Next Select individual visuals and Align them to the defined areas within the scrim.

    See sample image below with visuals aligned to the scrim.

    Finalize Report

    Apply any additional style properties for your visuals. In the below image the following settings are added for reference:

    • The top 4 cards are grouped and the group
    • The Grouped cards were applied a background of white @ 40% transparency
    • Labels were added to the bar charts
    • Unneeded axis were removed from the bar charts for clarity
    • White lines were added to the scatter chart for x and y axis

    Then rinse wash and repeat for every other page you need to develop.

    Here is a completed sample of this report:

    Check out scrims today

  • More Visuals Mo Problems

    More Visuals Mo Problems

    In some recent conversations the notion of minimizing the number of required visuals came up as a topic. While I know from talking with the Microsoft development team more visuals on a report page increases load time. But I haven’t been able to find any substantial numbers on how performance is impacted by increasing the visual count on a page. Spoiler alert, adding a ton of visuals to a page slows it down.

    Test Set up

    To begin our test I started with a know report the Microsoft September 2018 Layout. This was a good sample as it already had a number of visuals and buttons on the page. I then proceeded to create a single text box with some text in it. Then copy the text box over one hundred times. All the text boxes are placed into a single group. Grouping the text boxes allows for the ability to toggle on and off all of the visuals with a single click.

    Here is the before image of the report with the text boxes turned off:

    Now with all 100 text boxes turned on. Yes, not pretty I know, but it makes the point.

    Conducting the Test

    Now that the set up was complete we are able to use the performance analyzer to render all the visuals on the page.

    To open the performance analyzer with the new modern Power BI ribbon. Navigate to the View ribbon and click on the Performance analyzer button.

    With the Performance analyzer window open we Click the Start Recording button. This begins how the visuals perform when you interact with the report.

    There are two options at this point to start recording data.

    1. We can click on items on the report page
    2. Click the Refresh visuals button to refresh the entire page

    I chose option number two since I wanted a consistent method to record performance. This removes any human error by performing a sequence of clicks across the screen.

    After clicking the Refresh visuals the Performance analyzer generates a ton of data that we can sift through to understand performance of the report page. You can expand on one of the visual elements to understand how many milliseconds it takes for the visual to render by function.

    Note: For more details on each performance component read up on the Microsoft documentation found here: https://docs.microsoft.com/en-us/power-bi/desktop-performance-analyzer

    We can now export the data from the recording by Clicking the Export button.

    For my test I ran 5 performance tests with the text boxes turned off and 5 tests with the text boxes turned off. The process was the following:

    1. Click Start Recording
    2. Click Refresh visuals
    3. Click Export to extract the data, name the file for future review
    4. Click Clear to remove all data
    5. Go back to step 2 to Refresh visuals
    6. Repeat process until 5 performance tests are complete
    7. Turn on the Text boxes and repeat the process for 5 performance tests

    The Test Results

    Finally we can dig into the data and figure how much impact we incurred from all the visuals. After a bit of playing around with the datasets in Power Query we are able to come up with the following results.

    At a high level adding the 100 extra text boxes increased the load time from 174 ms up to 3,100 ms which is a approximately a staggering 1700 % increase in load time.

    Here is the detailed break down for average load times compared with and without text boxes.

    There are some interesting notes here. When we added the text boxes it caused all other visuals to increase load time from 22 up to 28 % percent longer per object. Clearly the text boxes took the longest to render.

    If you’d like to test this on your own, you can download these materials from this GitHub location: https://github.com/MikeCarlo/PBIReportVisualPerformanceTest

    Implications & Observations

    After completing this test there were a couple of observations that I felt would be best practices when building future reports.

    1. It is important to take time to clearly label your visual elements on the report canvas. Doing so makes it easy to identify each item in the performance analyzer.
    2. Increasing the number of visuals on a page hurts rendering performance. So think carefully about how many visuals you need to add to convey the data story you are trying to tell.
    3. When a visual is not shown it does not impact performance rendering of the page.
    4. A trend I am seeing is individuals are creating really long pages. Meaning the page is 1280 x 3000 or even 4000 pixels long. This is a nice feature that lets the report consumer scroll through multiple visuals. However, this has an unintended consequence adding all the extra visuals is slowing the time for the report to render. Instead of increasing the page length it would be better to control which visuals are being shown by using Bookmarks and Grouping. To learn more about bookmarks & grouping visuals visit:
    5. Limit adding style elements such as drop shadows and visual shading images as these will increase load speeds. Instead push those types of changes down to a background image that can be placed on the page. This is the technique used in creating PowerBI.Tips layouts.

    If you like the content from PowerBI.Tips please follow us on all the social outlets. Stay up to date on all the latest features and free tutorials.  Subscribe to our YouTube Channel.  Or follow us on the social channels, Twitter and LinkedIn where we will post all the announcements for new tutorials and content.

    Introducing our PowerBI.tips SWAG store. Check out all the fun PowerBI.tips clothing and products:

    Check out the new Merch!

    Hasta La Vista Data
    Go Ahead Make My Data
    PBIX Hat


  • Average Household Income Function in Power Query

    Average Household Income Function in Power Query

    This post will walk through how to pull an estimated household income from a US address. It will be completed all in the Power Query Editor. We will convert this to a function to reuse on any address we want.

    This is the second part in a series on free API calls. The first part demonstrated how to pull daily stock price from Yahoo! Finance, which is available here.

    Note: The content in this blog was first presented at the Power Platform Summit North America on October 18th, 2019.

    Introduction to the Data

    We cannot get exact income of a US address, but the US census releases data which is aggregated at different groups of households (called Geography Hierarchies).
    There are different levels of Geography Hierarchies, explained on the census website. The lowest level of granularity available for this data is Block Groups. This is a small group of blocks, and usually consists of about a few hundred to over 1000 people. A block group is expressed as a code.

    It is unlikely we will have the actual bock group code, but rather a street address. In order to retrieve information, we need to find which block group the address falls into. The first step is to convert the address into geographic coordinate, a process called Geocoding. You are probably familiar with using this feature – for example when you enter an address into a map app in order to get directions.

    The census.gov website offer a free service to do this (US Census TIGER). However, in my experience the match rate (percentage of addresses geocoded) is not as good as some other services – this means that some of the addresses you enter will not be found. There are many other companies that offer Geocoding services, such as Bing, who often provide better match rates. However, these tend to come at a cost. These can be used instead, but for this example we will focus on the free US Census TIGER service.

    Create an API Key

    The first step will be to sign up for an API key from the census website. API keys allow organizations to monitor usage and can stop overloading their databases with requests. Some can be used to charge for paid API calls, however the census API is free and only requires an email address. If you do not work for an organization, you can write “none”.

    Sign up here:
    https://api.census.gov/data/key_signup.html

    Storing the API Key

    Back in Power BI, on the home tab in Power Query, click Home, New Source, Blank Query.

    In the formula bar, Paste in the API key value you received. Rename the query to P_APIKEY.
    This will store the API key so it can be changed, but will not set it as a parameter and require it to be entered by the user every time they use the function.

    Setting up Parameters

    In the power query window, under the Home ribbon, Click the bottom half of the Manage Parameters button. From the drop down Select the option New Parameter.

    Name the parameter P_Address. Change the Type field to Text. Enter 15010 NE 36th St in the Current Value input box.

    Repeat this step 3 more times, so you will have 4 parameters in total. Use the below table for the names and default values:

    NameDefault Value
    P_Address15010 NE 36th St
    P_CityRedmond
    P_StateWA
    P_ZIP 98052

    Function Part 1: Geocoding

    On the home tab, Click New Source > Web. Switch to the advanced tab, Then in the open dialogue box, first Click the button Add part. This will add a new box. Repeat this to add 9 web parts. Afterwards, locate the first window and Enter part 1 of the URL. In the second box, Change the abc symbol to a parameter.  Fill in the boxes like below:

    1https://geocoding.geo.census.gov/geocoder/geographies/address?street=
    2P_Address 
    3&city=
    4 P_City
    5&state=
    6 P_State 
    7&zip=
    8 P_ZIP 
    9&benchmark=Public_AR_Census2010&vintage=Census2010_Census2010&layers=13&format=json

    Note: Do not enter the rows that begin with  P_ directly (rows 2,4,6,8). Switch the type to parameter and pick from the list.

    This will return a result: Record. Click on the Record value to drill into it.
    In the convert tab, click To Table to transform to a table.
    We have extra information here, but we are only interested in the blockgroup data. Filter the column Name to include the following rows only:
    “BLKGRP” , “COUNTY”, “STATE” , “TRACT”
    (make sure you keep the correct columns with these exact names).

    Now we have the correct columns, but for our function to waork we want them in one row. Highlight the Name column, navigate to the transform tabe and click Pivot Column. The symbol is:

    Expand the Advanced Options, and change the Aggregate Value Function to Don’t Aggregate.

    If you are following with the Microsoft head office, your data should look like this:

    Now that we have the address geocoded, we can find out census information.

    Function Part 2: Returning Household Income

    To add the second API call, we can take advantage of the custom column. It is actually possible to use Power Query (M) code in the custom column.
    Click Add Column then Custom Column.

    The code needed for the column is below. You can copy and paste this directly into the “Custom column formula” :

    Json.Document(Web.Contents("https://api.census.gov/data/2018/pdb/blockgroup?get=Tot_Population_CEN_2010,avg_Agg_HH_INC_ACS_12_16&for=block%20group:" & [BLKGRP] & "&in=state:" & [STATE] & "%20county:" & [COUNTY] & "%20tract:" & [TRACT] & "&key=" & P_API))

    Breaking this code down:
    Json.Document tells Power BI the value being returned is in JSON format, and to decode this to a list
    Web.Contents will tell Power BI we are going to be sending a web (api) query
    https://api.census.gov/data/2018/pdb/blockgroup?get=Tot_Population_CEN_2010,avg_Agg_HH_INC_ACS_12_16 is our base URL will some parameters. The parameters we’re giving are to return population and average household income
    -The second half of the URL takes in the location from the current row. anything in [Square Brackets] is a column. P_APIKEY is the parameter we set up earlier, that holds our API key

    This will add a new column holding a list of lists. Click on the word list to drill into it

    This will bring to the second level, two lists. Afterwards, Transform to a table by clicking on the “To Table” button in the ribbon, under list tools > Transform.
    After it is in table format, we expand the values to take them out the list. The data has two lists, the first is the column headers and the second is the values, so we need to transform a little to see the data in a nice format.
    Firstly, expand the values by clicking the expand button and select Extract Values.

    This will expand to one column, separated by a character of our choice. I’m going to use the carat symbol (^), as I’m confident this will not be a character already in the data. To do this, change the first box to –Custom– then type in the carat symbol.

    After extracting the data from the lists, we can split it into columns. We will split on the delimiter we added, the carat symbol (^). Click on Home Tab, Split Column, By Delimiter.

    Same as before, change the first box to –Custom– then type in the carat symbol. Leave the default setting of “At each occurrence of the delimiter”.

    Now it is split, promote the first row to headers by going to the Transform tab and use the “Use first row as headers”.


    Finalizing the Function

    As a result, this returns lots of columns. Highlight the Tot_Population_CEN_2010 and avg_Agg_HH_INC_ACS_12_16 column, right click and select “Remove other columns”.
    Rename the two columns to “Population” and “Household Income” by double clicking the column header and typing the new name.
    Finally, highlight both columns, enter the Transform tab and click “Detect Data Type” to convert the data type.

    Optional: If you want to add the original address in, Click Add Column then Custom Column. Enter the below code, which will concatenate the address to one value. You can name the column Address.

    P_Address & ", " & P_City & ", " & P_State & ", " & P_ZIP  

    Creating the Function

    This query uses a parameter which enables us to can convert it to a function. To do this, right click on the query in the Queries pane on the left and select make function.

    Now we have a function where we can input any address and return the estimated household income, as well as population of this average is taken from(n value). To check multiple addresses, you can add your function to any list. This can be found in Add Column ribbon, then Clicking the button Invoke Custom Function. This will return a table for each row. Before expanding, it is important to handle errors, otherwise it could break the query. One option is to Right Click the column header, and select the Replace Errors option, and Type the text null.

    Final Function

    For those who like M code, here is the final function. You can copy and paste this directly into the advanced editor (See this article on how to do this).

    let
        Source = (P_Address as any, P_City as any, P_State as any, P_ZIP as text) => let
        
                Source = Json.Document(Web.Contents("https://geocoding.geo.census.gov/geocoder/geographies/address?street=" & P_Address & "&city=" & P_City & "&state=" & P_State & "&zip=" & P_ZIP & "&benchmark=Public_AR_Census2010&vintage=Census2010_Census2010&layers=13&format=json")),
                result = Source[result],
                addressMatches = result[addressMatches],
                addressMatches1 = addressMatches{0},
                geographies = addressMatches1[geographies],
                #"Census Blocks" = geographies[Census Blocks],
                #"Census Blocks1" = #"Census Blocks"{0},
                #"Converted to Table" = Record.ToTable(#"Census Blocks1"),
            #"Filtered Rows1" = Table.SelectRows(#"Converted to Table", each ([Name] = "BLKGRP" or [Name] = "COUNTY" or [Name] = "STATE" or [Name] = "TRACT")),
                #"Filtered Rows" = Table.SelectRows(#"Filtered Rows1", each ([Name] = "BLKGRP" or [Name] = "COUNTY" or [Name] = "STATE" or [Name] = "TRACT")),
                #"Pivoted Column" = Table.Pivot(#"Filtered Rows", List.Distinct(#"Filtered Rows"[Name]), "Name", "Value"),
            #"Added Custom" = Table.AddColumn(#"Pivoted Column", "Custom", each Json.Document(Web.Contents("https://api.census.gov/data/2018/pdb/blockgroup?get=State_name,County_name,Tot_Population_CEN_2010,avg_Agg_HH_INC_ACS_12_16&for=block%20group:" & [BLKGRP] & "&in=state:" & [STATE] & "%20county:" & [COUNTY] & "%20tract:" & [TRACT] & "&key=" & P_APIKEY))),
            Custom = #"Added Custom"{0}[Custom],
            #"Converted to Table1" = Table.FromList(Custom, Splitter.SplitByNothing(), null, null, ExtraValues.Error),
            #"Extracted Values" = Table.TransformColumns(#"Converted to Table1", {"Column1", each Text.Combine(List.Transform(_, Text.From), "^"), type text}),
            #"Split Column by Delimiter" = Table.SplitColumn(#"Extracted Values", "Column1", Splitter.SplitTextByDelimiter("^", QuoteStyle.Csv), {"Column1.1", "Column1.2", "Column1.3", "Column1.4", "Column1.5", "Column1.6", "Column1.7", "Column1.8"}),
            #"Changed Type" = Table.TransformColumnTypes(#"Split Column by Delimiter",{{"Column1.1", type text}, {"Column1.2", type text}, {"Column1.3", type text}, {"Column1.4", type text}, {"Column1.5", type text}, {"Column1.6", type text}, {"Column1.7", type text}, {"Column1.8", type text}}),
            #"Promoted Headers" = Table.PromoteHeaders(#"Changed Type", [PromoteAllScalars=true]),
            #"Changed Type1" = Table.TransformColumnTypes(#"Promoted Headers",{{"State_name", type text}, {"County_name", type text}, {"Tot_Population_CEN_2010", Int64.Type}, {"avg_Agg_HH_INC_ACS_12_16", Currency.Type}, {"state", Int64.Type}, {"county", Int64.Type}, {"tract", Int64.Type}, {"block group", Int64.Type}}),
            #"Removed Other Columns" = Table.SelectColumns(#"Changed Type1",{"Tot_Population_CEN_2010", "avg_Agg_HH_INC_ACS_12_16"}),
            #"Renamed Columns" = Table.RenameColumns(#"Removed Other Columns",{{"Tot_Population_CEN_2010", "Population"}, {"avg_Agg_HH_INC_ACS_12_16", "Houshold Income"}})
        in
            #"Renamed Columns"
    in
        Source

    If you like the content from PowerBI.Tips please follow us on all the social outlets to stay up to date on all the latest features and free tutorials.  Subscribe to our YouTube Channel.  Or follow us on the social channels, Twitter and LinkedIn where we will post all the announcements for new tutorials and content.

    Introducing our PowerBI.tips SWAG store. Check out all the fun PowerBI.tips clothing and products:
    Store Merchandise

  • Owners

    Meet the Creators of PowerBI.Tips

    Mike Carlo

    I created this site back in 2016 as a way to learn Power BI. Since then, we have developed many tools and articles to help you create impactful reports.

    The Power BI product is a game changer for organizations. I’ve personally worked on projects where Power BI has saved companies thousands of dollars and help deliver new business solutions. I hope that PowerBI.Tips can enable your business to do the same.

    Follow me on: Linkedin, or Twitter

    Seth Bauer

    As a co-owner of PowerBI.Tips I enjoy helping create a platform for new and advanced users alike to learn and expand their skills and get the most out of Power BI.

    My background mixes a degree in Art with over 11 years experience using and building Microsoft enterprise BI solutions. I was an early adopter of Power BI and I believe it has grown to be one of the best analytics tools on the market. Unlike other analytics and reporting tools it also has capabilities that drive deeper into exciting areas of integration with Data Science, Natural Language Processing, live streaming, and machine learning to name a few.

    Follow me on: Linkedin or Twitter

    Seth and Mike have been running the local Milwaukee Power BI User Group called the “Brew City” PUG since 2015.  If you’d like to join our PUG you can do so here.

  • Grouping with Style

    Grouping with Style

    Grouping with Style

    The release of grouping visuals was an extremely welcomed feature. As one who builds lots of reports grouping elements together is essential to stay organized and to increase report building speed. Since I’ve been using this great new, I found an interesting design element to style groupings for reporting impact. The grouped visuals feature enables a new property, background color.  This can be applied for the entire group of visuals.

    See the following example of setting a background around two visuals.

    In this example the intent is to show the user that these two visuals are related. The graph on the left shows the number of units sold for a selected time period. The bar chart on the right shows the relative sales over time represented as a percent change. This illustrates the principle of position and direction. The number of units sold is what happened right now. It is my place in time with respect to sales. However, this does not show any context to performance. The percent change provides the directional context.  Since the position and direction are an important insight as a paired visual, we use the grouping to visually bind the two.

    For those who have done some research around design principals inevitably you will stumble across the Gestalt Principals of design.  Grouping visuals with a common background falls into the Law of Common Region or Law of Proximity.

    Alright let’s walk through how to use grouping with backgrounds colors. 

    Once you have created the visuals which will be grouped together; select each visual by holding CTRL and Selecting each visual.

    Right Click on one of the visuals and select the menu item labeled Group, in the flyout menu select the option called Group.

    A grouped element will be created in the Selection Pane

    Note: If you don’t see the Selection Pane, you will need to turn this on.  The setting to turn the Selection Pane is found in the View ribbon with the check box for Selection Pane. See below for reference.

    With the newly created group being selected, Click on the Paint Roller (Format) icon in the Visualizations Pane.

    Expand the property section called Background. Toggle the background to be On and select a Color from the drop-down menu.  For this example, I selected the very first shade of grey in the first column of colors.

    The final product will be a grouped arrangement of visuals with a shaded background.

    To extend this idea further we can take the same approach when working with Text boxes and Visuals.  Often, I find I need more style for applying a Text box or header to a visual.  In these cases, I will use two visual elements to create one visual.  See this example of two visuals with custom titles created with a textbox.

    Note: Backgrounds are colored differently to illustrate that each background for the grouped visuals is different.

    While this meets the need the boxes are not identical in size.  This violates yet another Gestalt Principle, symmetry.  The bounding regions of the elements inside the grouping define the outer perimeter of the background shading.  Knowing this we can modify the visuals within the groups to provide a symmetrical background shape.

    Here are the same before and after images with each visual object colored to see the adjustments in size for each visual type.  This creates the proper background sizes. 

    Before:

    After:

    The visual on the left required an increase of the text box at the top to get the desired width of the background shape.  By contrast the visual on the right required an extension of the bar chart in length to acquire the desired length of the background.  The result provides a symmetric view of both visual groups.

    If you like the content from PowerBI.Tips please follow us on all the social outlets. Stay up to date on all the latest features and free tutorials.  Subscribe to our YouTube Channel.  Or follow us on the social channels, Twitter and LinkedIn where we will post all the announcements for new tutorials and content.

    Introducing our PowerBI.tips SWAG store. Check out all the fun PowerBI.tips clothing and products:

    Check out the new Merch!

    Hasta La Vista Data
    Go Ahead Make My Data
    PBIX Hat


  • Icons upon Icons

    Icons upon Icons

    I am just bursting with excitement!! This month the amazing Power BI team has yet again come out with a great new feature, Icon sets. In addition to this you can enhance these icon sets by adding your own custom icons to your Power BI reports. Woo Hoo….

    So what does this mean? Well, now you have a new Conditional Formatting box found in the settings of the Table and the Matrix properties. To use a built in Icon from Power BI. Create either a table or a Matrix visual with some data.

    Select the visual and adjust it’s properties by clicking on the Paint Roller and opening the Conditional Formatting window.

    Scroll down until you see the toggle button for Icons. Turn the Icons On.

    Click on the Advanced Controls to set the properties of the icons based on the data properties. This type of dialog box should look familiar as it is similar to the previous boxes for conditional formatting. Opening this window shows Icons for each Rule in the list. To adjust an icon Click on the Drop Down Arrow next to the icon you wish to change. There are multiple icons to choose from.

    There are limited selections by default, but you can enhance this by adding your own icons with the custom Json theme files. At PowerBI.tips we love our theme files. They make using standard settings so much easier.

    Loading the Custom Icons

    For starters we have already done the hard work of creating an additional 50 icons for you to use in your reports. Download the Icon Theme File Here

    Update: Special thanks to Reid Havens from Havens Consulting for contributing extra icons to this Icon Set.

    With this file you get these additional icons:

    To add these additional icons follow these steps:

    1. Download the theme file -> Here
    2. Unzip the downloaded file to find the PowerBITips Icons v1.json file
    3. Navigate to the Home ribbon in Power BI Desktop
    4. Click on the Switch Theme button
    5. Select the list item Import Theme from the drop down menu
    6. The open file dialog box will open. Select the PowerBITips Icons v1.json file that you downloaded earlier.

    Boom, and just like that you have loaded your new icons. Now you can return to the icons for your table or matrix and adjust until your heart is content.

    Here is a sample of a table and a matrix with some custom icons applied:

    Update 2019/08/06: When publishing the Power BI file to the PowerBI.com service, the fill colors for the shapes need to have a %23 instead of a # (HASH) infront of the HEX codes. Thus, the format should look like fill=’%23FF0000′ instead of fill=’#FF0000′

    If you liked the tables from this blog they came from one of our Layouts that we produce. The Microsoft Layout September 2018, download it here.

    If you like the content from PowerBI.Tips please follow us on all the social outlets. Stay up to date on all the latest features and free tutorials.  Subscribe to our YouTube Channel.  Or follow us on the social channels, Twitter and LinkedIn where we will post all the announcements for new tutorials and content.

    Introducing our PowerBI.tips SWAG store. Check out all the fun PowerBI.tips clothing and products:

    Check out the new Merch!

    Hasta La Vista Data
    Go Ahead Make My Data
    PBIX Hat